Tuesday, 22 October 2013

Gorse Flower Wine

I've said before that we seem to be farming gorse and I'm always looking for a way to do something useful with it - why waste a resource?

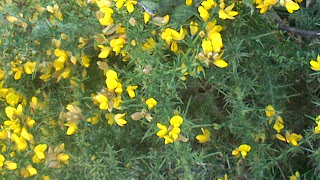
So when I saw Gorse Wine on an episode of River Cottage, I was intrigued.  The timing was great too, all the gorse was in flower.

I found the recipe on River Cottage's website and went off foraging.

Three hours later, I hadn't picked anywhere near enough flowers for this recipe, my fingers were bleeding and sore from all the prickles I'd gotten from the gorse and it was time for me to head inside and start thinking about cooking dinner for the family.  So I adapted the recipe to suit the volume of flowers I had.  Mine ended up as:

Gorse Flower Wine


4 pints gorse flowers - approx 2 litres measured with a half-litre jug.
6 litres of water
680g raw sugar
Juice of 2 lemons - my lemons are rather small this year
Gorse flowers heating in pot.
5g sachet of white wine yeast - I had this in the fridge from a previous wine making expedition

Place flowers and water into a stock pot, bring to the boil and then simmer for 15 mins.  Add sugar and stir until dissolved.  Move into a large bucket or brewing barrel and add lemon juice.  When cooled to just above room temperature, add yeast.  Cover with cloth and leave to stand for 3 days.  Strain and pour into demijohn or brewing barrel with airlock.  Bottle when fermentations stops - roughly two weeks.

I'm glad I used a much reduced recipe - this small amount almost filled my stock pot, I wouldn't have had the capacity to do much more.  It smelled like freshly mown grass while it was sitting for those first three days.

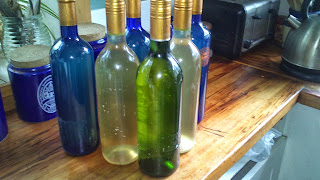
Six bottles of Gorse wine on the bench
I make a habit of regularly having a wee taste while my wines are fermenting, I find it interesting to notice how much the flavour can change in even two weeks.  The bottled product tastes to me like a dry white wine, I'm not noticing the coconutty flavours that many people have talked about with this wine - but then again, I'm not a big fan of white wines.


Monday, 21 October 2013

Granny Squares - Snowflake Style

I always seem to end up with partial balls of yarn.  I've been given bags filled with them by people who see them as rubbish.

Granny squares are easy and a good way to use up left-over bits and pieces.

The simple and plain snowflake pattern squares are probably the most common, as well as being a good starting place for making squares.

A guide to the abbreviations I use (US abbreviations and stitch names) can be found here.

Snowflake Granny Squares:

Snowflake Granny Square in one colour

1st Round: ch 6, slst into 1st ch to form foundation ring.
2nd Round: 3ch (to form first tr of pattern) 2tr, 2ch, 3tr, 2ch, 3tr, 2ch, 3tr, 2ch, slst into first st, then sl st to 2ch gap.
3rd Round: 3ch (to form first tr of pattern) 2tr, 2ch, 3tr, 1ch, 3tr, 2ch, 3tr, 1ch, 3tr, 2ch, 3tr, 1ch, 3tr, 2ch, 1ch, slst into first st, then sl st to 2ch gap.
4th Round:  3ch (to form first tr of pattern) 2tr, 2ch, 3tr, 1ch, 3tr, 1ch, 3tr, 2ch, 3tr, 1ch, 3tr, 1ch, 3tr, 2ch, 3tr, 1ch, 3tr, 1ch, 3tr, 2ch, 3tr, 1ch, 3tr, 1ch, slst into first st, then sl st to 2ch gap.
5th Round: 3ch (to form first tr of pattern) 2tr, 2ch, 3tr, 1ch, 3tr, 1ch, 3tr, 1ch, 3tr, 2ch, 3tr, 1ch, 3tr, 1ch, 3tr, 1ch, 3tr, 2ch, 3tr, 1ch, 3tr, 1ch, 3tr, 1ch, 3tr, 2ch, 3tr, 1ch, 3tr, 1ch, 3tr, 1ch, slst into first st.

Lots of small Granny Squares made into a blanket.
Most of mine will stop at four rounds if I'm making basic squares, or you can continue in this manner until you reach the size you want.

I have made entire blankets as one 'square' that I've just continued until it was bed sized.

You can change colours for each round if you like.  In that case, after the slip stitch to complete the round, fasten off that colour and start your new colour in the corner 2 chain gap.

Blanket made from Granny Squares including big squares.
In one of the boxes of Grandma's stuff that Mum recently gave me there is a huge amount of old magazines and pattern books, several of them contain different types of Granny Squares, as well as different uses for them.

There are cushions, made the obvious way, but also so that the joined squares make an X in the middle of both sides of the cushion.  Baby blocks made from six squares joined in a cube and stuffed.  There are Granny Squares made out of heavy yarn and turned into coffee mug coasters, hot pot stands and pot mitts.

In a Woman's Day Super Special from 1983 - titled Granny Squares & Needlework there are several patterns to make jerseys and cardigans from Granny Squares - one is made up of several Granny Squares of varying sizes joined for the body of the garment.  Another is one large Granny Square as the front and another for the back.  The sleeves are ordinary crochet.
See the pretty (??) jersey made from Granny Squares on the cover

There are other styles of Granny Square and other shapes - round ones and hexagonal ones.  Some have flowers, some are still square, but are done as corner patterns.

And then there are the wealth of books filled with many different types of Granny Squares.  See below for a selection - there were nearly 900 returns on a search on Granny Squares.


UPDATE:

One of the things that I've always struggled with somewhat is joining the Granny Squares.  Today I found a fantastic website that has links to 10 different tutorials each showing different ways to join the squares - most are fairly invisible.

That link? Knot Your Nana's Crochet


Crochet Abbreviations and Stitches

I think it's worth noting that in this blog, with the crochet patterns that I post, I use US abbreviations.  I find them more sensible than UK abbreviations and many of the patterns that I am finding and adapting are from the US.


Abbreviation
US
UK Equivalent
Ch
Chain Stitch
Chain Stitch
Sc
Single crochet
Double crochet
Dc
Double crochet
Treble crochet
Tr
Treble crochet
Double treble crochet
Hdc
Half double crochet
Half treble crochet
htr
Half treble crochet
Half double treble crochet
slst
Slip stitch
Slip stitch


What Those Stitches Mean

Here, I've not only described what those stitches mean, but there are also simple instructions on how to crochet.


Chain Stitch - hook through loop and pull a loop through.

Chain Stitch complete
Chain Stitch beginning


Single Crochet - hook through stitch and pull a loop through.  There should be two loops on the hook.  Pull another loop through both loops on the hook.


Single Crochet beginning
Single Crochet half done

Single Crochet complete


Double Crochet - wrap the yarn around the hook before pushing the hook through the next stitch.  Pull a loop through the stitch on your work, three loops on the hook.  Pull a loop through the first two loops on the hook.  Pull a loop through the last two loops on the hook.

Double Crochet beginning
Double Crochet, pull first loop through
Double Crochet, pull loop through first two loops
Double Crochet, pull loop through remaining two loops

Treble Crochet - wrap the yarn around the hook twice before pushing the hook through the next stitch.  Pull a loop through the stitch on your work, four loops on the hook.  Pull a loop through the first two loops on the hook.  Now there will be three loops on the hook.  Pull a loop through the next two loops on the hook.  Pull a loop through the last two loops on the hook.

Treble Crochet, yarn twice around hook before pushing hook through work


Treble Crochet, pull loop through stitch
Treble Crochet, pull loop through first two loops


Treble Crochet Complete
 
Treble Crochet, pull loop through next two loops


Half Double Crochet - wrap the yarn around the hook before pushing the hook through the next stitch.  Pull a loop through the stitch on your work, three loops on the hook.  Pull a loop through all loops on the hook.  This differs from a double crochet as you don't pull the loop through two loops at a time - it's all done in the one loop.

Half Double Crochet, yarn around hook before pushing hook through work


Half Double Crochet, pull loop through stitch
Half Double Crochet Complete


Half Treble Crochet - wrap the yarn around the hook twice before pushing the hook through the next stitch.  Pull a loop through the stitch on your work, four loops on the hook.  Pull a loop through all stitches on the hook. This differs from a treble crochet as you don't pull the loop through two loops at a time - it's all done in the one loop.


Half Treble Crochet, yarn around hook twice before pushing through work


Half Treble Crochet, pull loop through stitch
Half Treble completed.


Slip Stitch - push the hook through the stitch on your work.  Pull a loop through and through the loop on the hook.
Slip Stitch complete

Slip Stitch beginning


Monday, 14 October 2013

More Piglets

Darla - Photo Copyright 2013 Tee Marie Photography. All rights reserved.
Just after Darla had her previous litter of piglets (like the next day) we saw our boar on her making more.  Doing the maths meant our next litter of piglets was due mid-August.  We were going to try to make sure that this lot wouldn't be abandoned by their mother so we decided to build a farrowing shed and as is typical for us, we only really started work on it about two weeks before we thought she was due.

Some of the stuff we pulled out of the truck canopy.
Our first big issue was a shed.  We had an old garden shed, kindly donated by Hubby's parents when they left their red-zoned house in Christchurch.  It was in a paddock but didn't cope with the winds there and tried to fly more than once.  It's now in pieces behind the big shed and Hubby didn't think it would be worth trying to use it.

Floor in and pen started.
We decided on an old truck canopy that was being used for storing all kinds of crap - actually, we've been through it, but haven't added anything to it, this was all left behind by the previous owners!  This is just one of three sheds that were chock-filled with might-be-kinda-useful-one-day type of stuff.  It didn't take long to empty it and sort out the contents.  Finding a new home for them is going to be interesting though.

Patched holes in the roof.
Pallets make useful pens.
Add a creeper rail to give piglets a safe space.
So our first job was that it needed a floor.  As it sat on a slope between two trees this was a bit of a challenge, but propped up to roughly level pallets on the downhill part and plywood over top fixed that.

So next the walls.  I found two pallets that were in pretty good condition and roughly the right size to be walls for the pen.  At my direction, Hubby made a creeper rail and the gate.

I got the wiring all ready to go, just needed the last few fittings and to be connected up to the power.  We were also worried about the potential for leaks dripping on heatlamps and wiring (and piglets).

It was nearly there, but I was sure she was due to drop them any day now.  I spent several hours most nights figuring out what I'd do if she delivered them before we were ready - as a result, I spent a week exhausted and running on about two hours sleep each night.  It was not the safest time for me to be up a ladder riveting the roof patches on, or cutting the last piece of plywood for the floor, or really doing anything much.

Mid August came and went.  No sign of piglets.  Darla's udder swelled up and her nipples were pointing out sideways, but semi-regular checks showed no piglets yet.  The urgency to finish the shed waned.  Then we had the big storm which put many things on hold while we cleaned up that mess.

We dithered and added a little bit here and there, it was nearly but not quite finished for the next six weeks.  I kept looking at my sow and asking her when those babies were coming.  She'd just grunt sweetly at me and flop down on her side for a belly scratch.

In the little hut all three big pigs normally share - about an hour after the last one was born.
Just over a week ago, we had visitors.  Our friend came to visit with his lovely Philipino fiancee.  She adores the pigs and came out to help Miss Seven feed them.  I noticed a smear of blood and mucous around Darla's nether regions.  Right, we have piglets on the way.  None yet that we could see - I'd interrupted her with food.

Hubby and I rushed to finish the shed, while she dropped a piglet in the paddock and then took herself off to the little house that all the pigs share.  I picked up the little white piglet and followed her.  My friend (who'd ended up nursing the previous litter) stayed and kept an eye on things while we worked on getting the farrowing shed finished.
In the new farrowing shed.

We ended up with just five piglets, but this time, Darla was a very good, patient and attentive Mum.  I watched piglets climb all over her, bite her face, and wander all around her.  She'd lift a leg and let them past or just tolerate being a jungle gym.  She lies down slowly, giving them plenty of time to get out from under her, and checks on them constantly if she's outside and feeding.

Under the heatlamp
We've got them moved to the new farrowing shed and the piglets are growing well.  She even took them outside and had them out in the sun over the weekend. :)

For those who are interested in such things they were born in this order:
White, female - named Wilbur (Miss Seven is Charlotte's Web obsessed).
Black, female - named Lims-Kragma (Master Fifteen is a fan of Raymond Feist).
Spotted, female - named Perdita (would have been Pongo if male).
Black, male - named Stefano (actually seems to be stripes - not sure on the source of this name, Miss Seventeen chose it).
Out in the sun.
White, female - named Ghost (she went missing the morning after they were born, she disappeared in daylight but turned up in the paddock - no idea how she got out of the hut - 3 hours later perfectly fine and warm).
Five one week old piglets, sleeping in the sun.

Yes, that's right, four girls and one boy.  Order of birth: White, black, spotted, black, white.

We thought that was pretty cool.