Hubby loves sweet chilli sauce. Last year he asked me why I don't make it for him. Well, um, I guess it's because we don't grow chillies?
So we bought some chilli plants in spring and Hubby planted them among the capsicums and tomatoes. He thought he'd kept hold of the labels telling us what type of chillies and peppers we'd bought, but it would seem not. Or if he did, we have no idea where they've gotten to. We seem to have a mix of banana peppers, bell peppers, long red chillies and some that look like a small bell pepper - a little smaller than a golf ball.
Since the chillies have started ripening, I looked for recipes for Sweet Chilli Sauce. I found one embedded in a blog that seemed great on the surface, but as I got deeper, it used Sambal Oelek, a pickled chilli jam, that I don't have, instead of chillis which I do have and want to use. Using them was kind of the point of the exercise. So I carried on looking.
I found one on Taste.com.au, it seemed simple enough so I thought I'd try it.
The only problem was the proportions. My seven chillies weighed a grand total of 40g, the recipe called for 500g. That was quite a bit different. So I added approximately 60g of capsicum to make it up to 100g, much easier to convert the recipe then.
It cooked up quite quickly, I didn't simmer it for the full 30 minutes in the recipe and ended up with about a cup of hard chilli jam. A very hard chilli jam that was almost inedible. The tiniest bit on the edge of a teaspoon was enough to set your mouth on fire.
So I left it overnight while I considered my options. Today, I blitzed up two whole bell peppers and made it up with the full amount of white vinegar and sugar in the recipe, as the sugar dissolved, I added my hard fiery chilli jam from yesterday and stirred it around until it dissolved too.
After a taste test, I added more sugar.
We've tested it tonight and it's sweet and it's spicy. It's got a nice bite of heat to it without being overpowering.
So now I'm watching my chilli plants so I can make more.
Sweet Chilli Sauce
50g hot chilli peppers
2 whole red bell peppers
3 large cloves garlic
750 ml white vinegar
3 1/2 cups white sugar
Halve and deseed the chillis and peppers. Put into food processor with garlic and a little vinegar. Blitz until almost pureed. Put into a saucepan with the remaining vinegar and sugar.
Heat slowly, stirring constantly until the sugar has all dissolved.
Bring to the boil, then turn down heat and simmer until it starts to thicken. Taste test and add sugar if needed.
Be careful not to allow it to thicken too much - the sauce should still run freely when cold.
Friday, 29 March 2019
Tuesday, 19 March 2019
Doing Things With Peaches!
A workmate and good friend of Hubby's has a very prolific black boy peach tree. Every year we're given peaches and when we have pigs, buckets of bruised and windfall peaches. Have you ever seen a pig eating these? It looks like they've been taking big chunks out of each other, dark purple-red peach flesh dripping down their jaws. It's really quite disturbing.

Hubby got these on Friday, the same day as his motorbike came back from the shop. Our plan was for him to bring the motorbike home and as I was going into Christchurch for the weekend, I'd drop him back at work Friday night to bring his car home.
With the Mosque shootings on Friday afternoon, all those plans changed. We didn't go back for the car (with a bag of peaches sitting in it) until late Sunday afternoon. Probably half of the bag has gone to the chickens and they look just as dreadful eating them as the pigs did.
So today I started to do things with peaches.
Previously, I have bottled them in a light syrup. I think I still have a few jars in the depths of my pantry, we don't eat fruit this way very often. A few years ago, I cut them up and froze them. They're still there in the freezer too. I have to move them now and then searching for other things.
I wanted something I was sure I would use.
Out came the recipe books and searches through their dessert chapters. The old books, which are usually my go-to for anything like this, yielded nothing that excited me. I considered the peach souffle, but as I've never made a souffle of any sort in my life before, I chose to try it another time with a simpler version. Peach Flummery sounded interesting, but I didn't have enough cream or gelatine on hand.

Into the bigger, flasher and newer cookbooks I dove. One had peach muffins. The next had a peach crumble. We like crumbles, they're simple and easy and adaptable. I can freeze them.
The original recipe and inspiration came from River Cottage Gluten Free. I'm a little wary of this book these days. I made a cake from it about six months ago that had a lot of 'mix x, y and z together in a small bowl, then put aside'. Six different bowls and a saucepan were required for this cake! The cake was okay, but not anything overly special. So I read through the recipe carefully, looking for sneaky over the top dish usage.
I didn't have all of the ingredients, but crumbles are fairly adaptable. Below is my interpretation.
Peach Crumble
Peach Filling
Approx 800g peaches, stoned and cut into chunks.
Brown sugar to taste (depending on how sweet the peaches are)
30g butter
Crumble Topping
150g hazelnut meal
75g brown sugar
30g sorgham flour or psyllium husk
30g potato starch
1 tsp ground cinnamon
60g butter
Preheat the oven to 180 deg Celsius.
Put the filling ingredients into a saucepan. Heat gently until the peaches have softened and the butter and sugar have formed a thick sauce.
Put the dry crumble ingredients into a food processor and blitz to mix. Add butter and process until butter is fully rubbed in.
Pour or spoon filling into dish and spread crumble over top. I like to get handfuls of the crumble and sprinkle it around and around until the fruit is completely covered.
Bake for 40 minutes. Best served warm.


Hubby got these on Friday, the same day as his motorbike came back from the shop. Our plan was for him to bring the motorbike home and as I was going into Christchurch for the weekend, I'd drop him back at work Friday night to bring his car home.
With the Mosque shootings on Friday afternoon, all those plans changed. We didn't go back for the car (with a bag of peaches sitting in it) until late Sunday afternoon. Probably half of the bag has gone to the chickens and they look just as dreadful eating them as the pigs did.
So today I started to do things with peaches.
I wanted something I was sure I would use.
Out came the recipe books and searches through their dessert chapters. The old books, which are usually my go-to for anything like this, yielded nothing that excited me. I considered the peach souffle, but as I've never made a souffle of any sort in my life before, I chose to try it another time with a simpler version. Peach Flummery sounded interesting, but I didn't have enough cream or gelatine on hand.

Into the bigger, flasher and newer cookbooks I dove. One had peach muffins. The next had a peach crumble. We like crumbles, they're simple and easy and adaptable. I can freeze them.
The original recipe and inspiration came from River Cottage Gluten Free. I'm a little wary of this book these days. I made a cake from it about six months ago that had a lot of 'mix x, y and z together in a small bowl, then put aside'. Six different bowls and a saucepan were required for this cake! The cake was okay, but not anything overly special. So I read through the recipe carefully, looking for sneaky over the top dish usage.
I didn't have all of the ingredients, but crumbles are fairly adaptable. Below is my interpretation.
Peach Crumble
Peach Filling
Approx 800g peaches, stoned and cut into chunks.
Brown sugar to taste (depending on how sweet the peaches are)
30g butter
Crumble Topping
150g hazelnut meal
75g brown sugar
30g sorgham flour or psyllium husk
30g potato starch
1 tsp ground cinnamon
60g butter
Preheat the oven to 180 deg Celsius.
Put the filling ingredients into a saucepan. Heat gently until the peaches have softened and the butter and sugar have formed a thick sauce.
Put the dry crumble ingredients into a food processor and blitz to mix. Add butter and process until butter is fully rubbed in.
Pour or spoon filling into dish and spread crumble over top. I like to get handfuls of the crumble and sprinkle it around and around until the fruit is completely covered.
Bake for 40 minutes. Best served warm.

Thursday, 14 March 2019
Birds and Fruit
Our Summer has been pretty dry and harsh this year. I don't think we quite managed drought status and our humidity has been much higher than is normal. Our temperatures have certainly been up there and I think officially it was the third hottest on record.
This year though, the birds seem to be struggling. Their numbers appear the same, (despite having outdoor cats) but their preferred diet seems to have changed.
We will have no grapes this year. We had masses of bunches as they were growing. They are only just ripening now, there's the faintest hint of purple starting to show and there are maybe 5 bunches left. When you go anywhere near the grapevines, at least 10 blackbirds and thrushes fly out from it.
We didn't get any nectarines. They weren't ripe yet either. I think it took the birds about a week to clean an entire tree out.
My little apple tree was doing well. The apples were ripening and I'd been picking a few as they reddened. I was giving the small ones or partially eaten ones to the horse next door. He'd wait for me by the fence every day on my feeding rounds, patiently eyeballing me and pointedly looking at the apple tree. There were about 20 left, mostly looking about ready to pick, so I decided that was tomorrow's job. Only the next day there were 4. I could only see 3 cores and remains on the grass beneath the tree.
If it wasn't for all the birds visibly attacking my bigger apple tree, I would have believed that someone had come and stolen them. My bigger apple tree was losing at least 15 whole apples a day.
We missed out on the plums. Strong winds took care of them. The late winds also took the first apricots we've ever had off our young tree.
I've never seen anything quite like it. Well, I've seen the grapes go to the birds before, but not the other fruit and certainly not the way they're cleaning them up completely. I haven't decided how much I begrudge the birds my fruit. I, at least, have the option to go and get it from other sources.
This year though, the birds seem to be struggling. Their numbers appear the same, (despite having outdoor cats) but their preferred diet seems to have changed.
We will have no grapes this year. We had masses of bunches as they were growing. They are only just ripening now, there's the faintest hint of purple starting to show and there are maybe 5 bunches left. When you go anywhere near the grapevines, at least 10 blackbirds and thrushes fly out from it.
We didn't get any nectarines. They weren't ripe yet either. I think it took the birds about a week to clean an entire tree out.
My little apple tree was doing well. The apples were ripening and I'd been picking a few as they reddened. I was giving the small ones or partially eaten ones to the horse next door. He'd wait for me by the fence every day on my feeding rounds, patiently eyeballing me and pointedly looking at the apple tree. There were about 20 left, mostly looking about ready to pick, so I decided that was tomorrow's job. Only the next day there were 4. I could only see 3 cores and remains on the grass beneath the tree.
If it wasn't for all the birds visibly attacking my bigger apple tree, I would have believed that someone had come and stolen them. My bigger apple tree was losing at least 15 whole apples a day.
We missed out on the plums. Strong winds took care of them. The late winds also took the first apricots we've ever had off our young tree.
Thursday, 7 March 2019
Easy Cheesy
There are a few simple and quick cheeses that anyone can make. Here I've given recipes for my favourite three.
These cheeses don't require culture or specialised equipment, most ingredients are things that can easily be found in the average kitchen.
Be aware that your finished cheese will be about 10% of the milk you start with. If you start with 2 litres of milk, you can expect approximately 200g of cheese.

Queso Blanco
Queso Blanco is very much like ricotta, in the process and in the finished product.
Bring milk to the boil, stirring to avoid scorching as much as possible. Very slowly pour in white vinegar, while stirring, until milk curdles and separates. Make sure that it has separated completely into white fluffy curds and green whey. If it's just like grainy thick milk, add more vinegar and keep stirring.
Let sit for about two minutes then pour through a cloth lined colander. Strain until there is no more liquid to come out.
Add salt, garlic and/or olive oil to taste and use like ricotta.
This doesn't keep very well, I'd recommend using it within a week.
Cumin Paneer
I make this one often for my Hindi friends. I'm told it can be frozen, but I haven't tried freezing it myself.
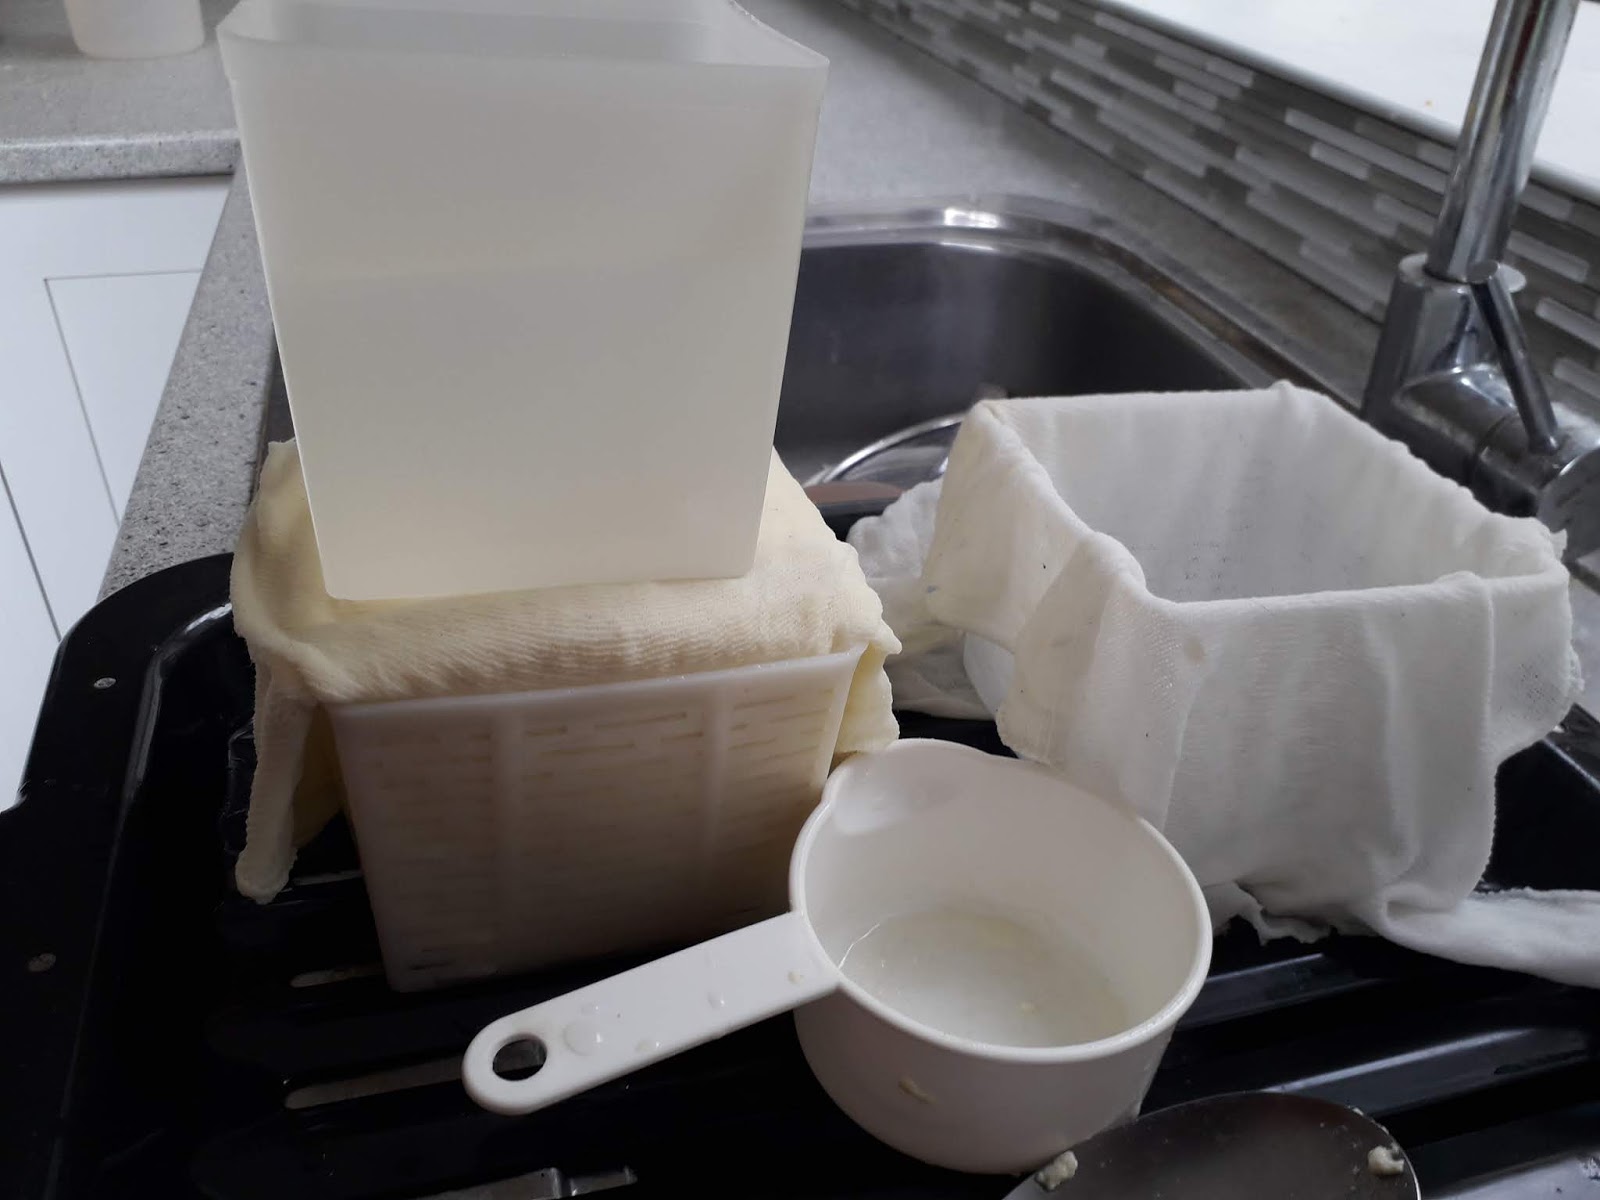
The recipe I started with said to strain it through a cloth lined colander, twist the cloth around and weight it down. This made the finished cheese a rounded ball. My Hindi friends are used to buying it in a square shape, and say this makes it easier to cut into cubes and use. My solution was to use a cloth to line a feta basket and make cube paneers.
The addition of salt and cumin not only gives this rather bland cheese some flavour, it extends it's keeping time. This should stay good for about 2 weeks.
My original recipe used lemon juice. I found myself out of lemons at one point, but my lime tree was so prolific, they were falling all over the ground underneath the tree. So I tried lime juice and it has worked just as well.
For every 2l of milk, add a tsp of non-iodised salt and a tbsp of cumin seeds. Bring to the boil gently, stirring constantly to minimise scorching. Let it boil for 3 minutes before adding lemon or lime juice. Pour citrus juice in slowly until milk curdles clearly into white fluffy curds and green whey.
Ladle into a cloth lined colander (or cloth lined feta basket). It may take some time for it all to settle, so be prepared to come back every so often to add more, but try and get it all in while it's still hot.
Fold cloth over and turn upside down in the basket. If you can find something square to weigh it down, this makes a better, firmer cheese.

Mozzarella
True Mozzarella is made with buffalo milk. This recipe uses ordinary cows milk. This recipe also requires liquid rennet. There are several varieties available in more places than you'd think. I often buy mine from Bin Inn (various cheese cultures and equipment can also be bought there) but there are plenty of websites that sell rennet fairly cheaply. Make sure that you are buying either calf rennet or vegetarian rennet and not junket rennet. Junket rennet is often sweetened although most modern recipes for junket seem to use normal rennet.
I found that mozzarella doesn't keep very well, so I grate it and freeze it in zip lock bags. This makes it easy to use on pizza and the like.
For every 2l of milk, you will need 1/2 tsp of citric acid.
Dissolve citric acid in 1/4 cup of lukewarm water and stir into milk. Heat milk to 31 deg C, stirring gently to prevent scorching.
Dilute 1/4 tsp of liquid rennet in 1/4 cup of cool water, add to milk and stir in gently.
Cover and let set for 30 mins.
Check for a clean break. This means run your knife through the centre of your curd and then either lift the split or pull to one side. If a clean break has been achieved, the two sides should part easily and hold their shape. The curd won't be firm, but will hold. If the curd seems a bit soft or not set, let it sit for another 15 mins.
Using a long bladed knife, cut the curd into half-inch cubes. I cut front to back and side to side, then turn my knife onto a fairly steep angle and cut the horizontal lines on an angle. I go back and forth with the knife about half an inch deeper down the side each pass. It doesn't make true cubes, but cuts them into roughly the right size. I turn the pot and do this four times to be sure I've got them all. Let stand for 5 mins.
Place pot over low heat and slowly bring the curds up to 41 deg C, making sure it takes 20 mins to get there. The curd will have cooled slightly from it's original temperature, but you're looking at approximately 1 degree raised every two minutes. Don't let it warm up too quickly. Stir constantly while heating. Turn off the heat and stir for another 20 mins. Let stand for 5 mins.
In another pot, bring fresh water to the boil. At least 2 litres but 4 often works better. Add non-iodised salt at a rate of 1 1/2 tbsp per litre and stir until dissolved.
Drain whey from curd through a cloth lined colander. Let the curds drain for 15 mins.
Place curds onto a clean chopping board and cut into 1 inch strips. Place into a large bowl and pour hot salted water over.
Wearing heat resistant gloves, or using a wooden spoon, work the strips under the water until they become soft and pliable. Knead, pull, stretch and fold it back on itself. Keep working until the cheese becomes long and stretchy, it will also become shiny and smooth. Work all the strips into a single large ball or into small bocconcini sized pieces.
I found another recipe that recommends microwaving the curds in 30 second bursts until an internal temperature of 72 deg C has been reached. I have used this method and it works, but can be messy and frustrating.
Place the cheese into a bowl of ice water for 5 mins. Drain on a paper towel.
Enjoy simple cheese making!
These cheeses don't require culture or specialised equipment, most ingredients are things that can easily be found in the average kitchen.
Be aware that your finished cheese will be about 10% of the milk you start with. If you start with 2 litres of milk, you can expect approximately 200g of cheese.
 |
| In the first two recipes, the curdled milk should look like this. |

Queso Blanco
Queso Blanco is very much like ricotta, in the process and in the finished product.
Bring milk to the boil, stirring to avoid scorching as much as possible. Very slowly pour in white vinegar, while stirring, until milk curdles and separates. Make sure that it has separated completely into white fluffy curds and green whey. If it's just like grainy thick milk, add more vinegar and keep stirring.
Let sit for about two minutes then pour through a cloth lined colander. Strain until there is no more liquid to come out.
Add salt, garlic and/or olive oil to taste and use like ricotta.
This doesn't keep very well, I'd recommend using it within a week.
Cumin Paneer
I make this one often for my Hindi friends. I'm told it can be frozen, but I haven't tried freezing it myself.
The recipe I started with said to strain it through a cloth lined colander, twist the cloth around and weight it down. This made the finished cheese a rounded ball. My Hindi friends are used to buying it in a square shape, and say this makes it easier to cut into cubes and use. My solution was to use a cloth to line a feta basket and make cube paneers.
The addition of salt and cumin not only gives this rather bland cheese some flavour, it extends it's keeping time. This should stay good for about 2 weeks.
My original recipe used lemon juice. I found myself out of lemons at one point, but my lime tree was so prolific, they were falling all over the ground underneath the tree. So I tried lime juice and it has worked just as well.
For every 2l of milk, add a tsp of non-iodised salt and a tbsp of cumin seeds. Bring to the boil gently, stirring constantly to minimise scorching. Let it boil for 3 minutes before adding lemon or lime juice. Pour citrus juice in slowly until milk curdles clearly into white fluffy curds and green whey.
Ladle into a cloth lined colander (or cloth lined feta basket). It may take some time for it all to settle, so be prepared to come back every so often to add more, but try and get it all in while it's still hot.
Fold cloth over and turn upside down in the basket. If you can find something square to weigh it down, this makes a better, firmer cheese.
Mozzarella
True Mozzarella is made with buffalo milk. This recipe uses ordinary cows milk. This recipe also requires liquid rennet. There are several varieties available in more places than you'd think. I often buy mine from Bin Inn (various cheese cultures and equipment can also be bought there) but there are plenty of websites that sell rennet fairly cheaply. Make sure that you are buying either calf rennet or vegetarian rennet and not junket rennet. Junket rennet is often sweetened although most modern recipes for junket seem to use normal rennet.
I found that mozzarella doesn't keep very well, so I grate it and freeze it in zip lock bags. This makes it easy to use on pizza and the like.
For every 2l of milk, you will need 1/2 tsp of citric acid.
Dissolve citric acid in 1/4 cup of lukewarm water and stir into milk. Heat milk to 31 deg C, stirring gently to prevent scorching.
Dilute 1/4 tsp of liquid rennet in 1/4 cup of cool water, add to milk and stir in gently.
Cover and let set for 30 mins.
Check for a clean break. This means run your knife through the centre of your curd and then either lift the split or pull to one side. If a clean break has been achieved, the two sides should part easily and hold their shape. The curd won't be firm, but will hold. If the curd seems a bit soft or not set, let it sit for another 15 mins.
Using a long bladed knife, cut the curd into half-inch cubes. I cut front to back and side to side, then turn my knife onto a fairly steep angle and cut the horizontal lines on an angle. I go back and forth with the knife about half an inch deeper down the side each pass. It doesn't make true cubes, but cuts them into roughly the right size. I turn the pot and do this four times to be sure I've got them all. Let stand for 5 mins.
Place pot over low heat and slowly bring the curds up to 41 deg C, making sure it takes 20 mins to get there. The curd will have cooled slightly from it's original temperature, but you're looking at approximately 1 degree raised every two minutes. Don't let it warm up too quickly. Stir constantly while heating. Turn off the heat and stir for another 20 mins. Let stand for 5 mins.
In another pot, bring fresh water to the boil. At least 2 litres but 4 often works better. Add non-iodised salt at a rate of 1 1/2 tbsp per litre and stir until dissolved.
Drain whey from curd through a cloth lined colander. Let the curds drain for 15 mins.
Place curds onto a clean chopping board and cut into 1 inch strips. Place into a large bowl and pour hot salted water over.
Wearing heat resistant gloves, or using a wooden spoon, work the strips under the water until they become soft and pliable. Knead, pull, stretch and fold it back on itself. Keep working until the cheese becomes long and stretchy, it will also become shiny and smooth. Work all the strips into a single large ball or into small bocconcini sized pieces.
I found another recipe that recommends microwaving the curds in 30 second bursts until an internal temperature of 72 deg C has been reached. I have used this method and it works, but can be messy and frustrating.
Place the cheese into a bowl of ice water for 5 mins. Drain on a paper towel.
Enjoy simple cheese making!
Subscribe to:
Posts (Atom)