Showing posts with label crafts. Show all posts

Sunday, 5 June 2022

Yarn From Dog Hair

 Just over a year ago, I was at a festival with some friends. Over a few drinks and amidst stories about keeping turkeys and peacock impersonations, one friend mentioned that when she brushes her Samoyed dog she gets enough hair off him to make another dog. 

There were a few laughs and the suggestion of spinning it.

I had mostly relegated that entire conversation into a 'fun times with friends' file and forgotten about it. 

Then in February, the friend I travelled to this festival with passed away. It was devastating for me. Totally unexpected and I was lost.

A parcel arrived on my doorstep from the friend who has the dog. It contained a lot of lovely white fibre. It was fine, soft and strong. I'd forgotten about our conversation and it was a bit painful to poke at the memories so it took me a few guesses before I realised what I had. 


Hubby was disgusted at first. He couldn't understand why someone would send me dog hair. But it made me laugh. It lightened my days and gave me something fun to do. 

I started spinning. At first it was lovely and clean, it spun a beautiful fine thread easily. Then as I got down through the bag, I reached the stuff with lots of dander.


By the time I finished, I was needing to stop every 10 minutes to wash my hands and blow my nose. I had a pile of doggy dandruff an inch deep beneath my spinning wheel. 

I did a lot of thinking while I was spinning. This tends to happen anyway. I wondered why yarn is always assumed to be sheep's wool, or lately alpaca or possum. Why aren't other fibres considered? I'm guessing it's mostly tradition. 

The yarn was plyed and washed. What am I going to do with this? I wanted to make something for the friend who'd given it to me and finally settled on gumboot socks. She's a dairy farmer and I'm sure good, warm gumboot socks would always be welcome. 


I worked on them while I was at the market. They made a great conversation starter, especially when crafters are comparing notes about some of the strange and wonderful things they've made. They knitted up so nicely, I'm currently working on a pair for myself and considering some mitts too. 

The knitted yarn feels so soft and warm that I'm excited to get mine finished. 

Wednesday, 21 April 2021

Dyeing Wool with Blackberries

 Our relatively wet summer showed itself this year in the size and volume of wild blackberries. I only travelled a short distance through the brambles and picked several kg of large, fat, juicy berries.

The problem, as ever, is what will I do with them this year.

I tried cordial one year, a non-alcoholic one.  The first attempt was weak and unpleasant.  The second was wonderful but grew a hideous mould fairly quickly and had to be thrown out.

This year, I made some fruit leather with them, but still had heaps left over.  I wondered, could I use it for dyeing my wool?

A quick Google search showed me I could.  To my surprise, the page I found explaining the process showed a lovely blue from dyeing with blackberries.  I was determined to try it. 

The instructions said to gently heat the berries in water.  Not to let it simmer or boil. I didn't have a stick mixer at this point, so once the berries were softened, I mashed them.

I mordanted my yarn, including a scarf I'd recently woven and dyed it.  

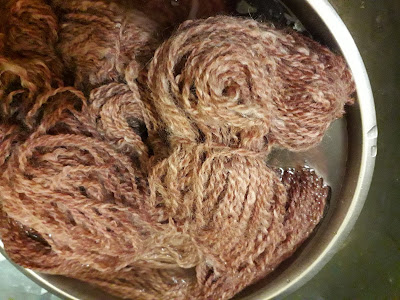
My first batch came out a lovely purple, with a pink tone to the purple.  Quite a bit different to the colour shown on the website.

In the dye bath

The scarf drying

I dyed some more yarn using the same dye bath and it came out a different shade of purple, more blue than purple this time. A third batch through the dye bath came out in a silvery grey with faint hint of blue.  Miss Fifteen argues with me about whether there is any blue or purple hint to the grey.

I picked more blackberries to do this some more, but because I was going to be away for a week, I didn't have time to dye any of it, so I froze them until I did have time.

Successive dyeing has turned out quite a range of colours.  No two are quite the same, and sometimes two skeins in the same batch came out in different colours. The batch that accidentally simmered came out with the least amount of colour, even though it was a fresh batch of blackberry dye liquor.

I have to say I haven't been particularly scientific or consistent in this process.  Next summer when the blackberries are fruiting again, I think I will be.  I will pay attention to times and temperatures, to ratios and ripeness and possibly even test the pH levels of my water.


All my different colour results

Tuesday, 2 February 2021

A New Project

I was working in a pretty toxic environment.  I would go to bed thinking about work, very angry about it and be unable to sleep.  Then I would wake up very early in the morning, still angrily thinking about work and unable to go back to sleep. When I woke up in this state at about 5am one Sunday morning, I found myself offended that it was invading my weekend and I was allowing it to happen. So I started casting about for other problems to solve, things I could think about that weren't work related.

I found myself thinking about the poncho I was making for my sister.  It was part of her lockdown list of requests and one I had tried doing about four different ways already and hating it more each time. It was going to be clunky and I would most likely not have enough of my homespun green wool to finish the project if I continued in any way like I had been doing.

I thought about fleshing it out with other colours or different shades of green, but as I was knitting it at that stage, the different strand thickness would create a host of other issues with it. Then it struck me, why not weave it?

I woke up inspired and went searching through the mega stash for shades of green. I found a bag of some partially pulled apart knitting.

I think I should pause here and explain the mega stash, in case I haven't done so previously.  I am the person other crafty hoarders destash to.  I can and do find a way to use any small odds and ends.  I have made them into stripes in socks, hearts and flowers on jerseys for my granddaughters and the obligatory granny square blankets. There is almost nothing I cannot find a use for and I hate waste.

As a result, any time any of my friends is having a clean out, I am given their cleanings.  A good friend's brother went to a garage sale quite a few years back and couldn't resist the stash he picked up there.  Someone's Grandmother's abandoned stash.  After my friend picked out what she wanted, I was given about four or five banana boxes worth.  Some were half finished projects, complete with needles, but never with the pattern.  Some almost completed projects that didn't take much know-how to finish.  A few that someone was in the process of unravelling.  You can tell by the crimp in the balled yarn.

As the only yarn crafter in the family, I got my Grandma's stash.  When my friend's mother passed away, I got what she didn't want out of that stash.  Needless to say, I haven't bought any yarn in years and have promised myself that I won't until I have made an impressive dent in all of this.

As a result, I have a room that is almost entirely dedicated to what I lovingly call my mega stash.  This also includes my own wool.  I have sacks of wool that I have washed but not yet spun and boxes of balls that have been spun but not yet used or set aside for a particular project.  At the moment, in the height of my "frantically washing the last shearing's fleeces season", you can barely fit in the door.

So I found this pillowcase (yes I got it that way) filled with a partially unravelled project in a dark bottle green that I thought would go beautifully with the emerald green of my homespun. I found a few other random balls of other shades of green that I thought would go nicely as a contrast.

I set up my loom and began weaving in a pattern.

There is a point in every project where I doubt everything about it.  These colours or pattern are terrible, what was I thinking? I haven't done this wide or long enough.  I've overcommitted and I'm going to run out and it will be an obvious flaw.

All of this went through my head, although the main one was "Omg, this looks like that upholstery on dining room chairs that was fashionable in the 80s". But the sister I was making it for loved it, so I persevered.


It wasn't wide enough, so I did two side panels to be added on afterwards.

I left a slot for a neck hole that I crochetted a collar onto.

When it was all finished, I threw it into the washing machine for a hot wash, to shrink and felt it somewhat. We all thought the finished project was stunning.


My other sister came for a visit before I'd been able to present the finished project and she loved it.  She also fell in love with some wool I was dyeing for another project.  I promised to make her a poncho too, but didn't think I'd have enough of the blue she loved for her poncho and we discussed a few other colours that I did have plenty of.  We were potentially looking at a red and white striped poncho.

It turned out that I did have a fair bit of the blue left over. Not quite enough for a poncho for her, but it could work with all the other little bits of blue in the mega stash. I ran low on blues so some pale violet and pinks popped up here and there.  And as an experiment, I used some of those fancy "feathers" yarns and loopy yarns that seem to be fairly popular but are hideous to knit or crochet with.


I kept everything about this project secret because I wanted to surprise her with her 'not red and white like she was expecting' poncho.  She didn't want a collar, so I cut and blanket stitched a neckhole.  I think that makes it a far more flexible poncho.  It can be worn as horizontal, vertical or diagonal stripes.  It is completely reversible.


I will be offering more for sale as part of another new project that these ponchos have inspired.


Monday, 18 May 2020

Dyeing Wool with Red Wine

My sister used to be a wine rep.  She would be the lady offering you a small sample in supermarkets.  She has quite a stockpile of half bottles that have gone a bit vinegary.

During our conversations over lockdown, she suggested using it to dye wool and offered it to me.  I jumped online to do some research.

Most blogs and videos showed people putting wool directly into red wine and boiling it.  The resulting colour was so faint it was barely pink.  Some mentioned using a mordant. I'd heard of mordants with natural dyes and always been a little afraid of it.  I didn't really understand the process or exactly what I should use or where to get it. Google is my friend.

I learned that the word mordant comes from the Latin mordere meaning 'to bite'. The use of a mordant allows the colour to 'bite' into the fabric or fibre being dyed.  Often, what we use as a natural dye is more of a stain than a dye.  The resulting colour is unlikely to be colourfast or lightfast.  It is usually faint and will fade. Mordanting opens up the fibre and allows it to grab more of the colour.
For more on the process, including step by step instructions for different fibres, I recommend this site.

Alum (Aluminium potassium sulfate) is the best mordant for wool.  Adding citric acid or cream of tartar to the mordant bath keeps the wool soft and may deepen some dyes. I found some quite reasonably priced at Hands Ashford and ordered online.

Meanwhile I was spinning madly.  I had been given some Romney fleece and it was spinning up beautifully.  My alum arrived. I weighed two skeins and started them soaking before mordanting. I measured out my alum and citric acid and started my dye bath in an old aluminium stockpot that I have used for dyeing before.


I'm always a bit iffy about boiling wool.  I'm afraid it will make my wool brittle.  I heated it to a simmer and turned it off.  After an hour or so, I heated it some more and left it to cool overnight. I had read in a couple of places that I could wrap it wet in a towel, roll it up and leave it for 2-5 days.  But I wasn't sure if I should rinse it first.  At first I couldn't find the original instructions I'd read.  They were all telling me to rinse and dry and then dye.  My rough instructions from Hands mentioned rolling it damp in a towel, but didn't mention rinsing.

I found the instructions I'd been looking at originally, don't rinse.  The point is to allow the mordant to soak more thoroughly into the wool and 'curing' it this way makes for a better dye job.

I got some gloves on and squeezed most of it out of the wool and laid it out on a towel.


By the time we dropped to level 3 and I was able to go and visit my sister (still keeping distance of course), I had three towels or six skeins curing. I reused my mordant five times, just adding 10% more alum and citric acid each time.


I worried a little about what I would use for a dye bath.  My usual dye pot was still in daily use for mordanting.  But since wine is effectively a foodstuff, I decided it would be safe to use my cooking stockpot.  I put two skeins in and covered them in wine.

It rather looks like minced beef though.

I heated this to a simmer and let it cool a little and repeated the process.  Pretty much like the mordant.  I checked it every now and then to see how much the wine colour had soaked in.  Pouring a little water over some exposed wool shows how much washes off.


I left it overnight before washing and rinsing.  I used a very small amount of laundry powder and washed and rinsed until the water was coming out clear.


I wrung it out and laid it out on a clotheshorse to dry.

The big bonus I noticed in dyeing with wine is that it can be reused for the next batch.  When I've used acid exhaust dyes, you know when the dye is done because all the colour is in the wool and the bath has almost clear water.  This doesn't happen with wine.

I am quite pleased with the colour.  It has come out darker than I expected, but not as bright as I'd hoped.  Still it's quite pretty. Coming up next is coffee dyeing.


Sunday, 2 February 2020

A Woven Rug

I've been working to catch up on washing all the fleece I've got stashed around.  I keep trying to catch up so that I have none left to wash by the time I get my sheep shorn again.  The only time I have ever achieved that was when I had only two adult sheep.

Part of the hold up was when I was given a fadge filled with coloured fleeces.  It took me a while to get through them, then I was back onto mine and just never quite seemed to get caught up.

One fadge from years ago, went into the garden shed.  The shearer we had then, used a battery handpiece and would shear them wherever we had them penned.  He never used a carpet or even a tarp so the fleece was full of grass, seeds and thistle. He didn't separate the dags or belly wool out either.  It was awful to try and clean up.

I was away when he came that time.  He mucked us around for months, we lost a sheep to flies in that time.  He also did the lambs.

So this fadge has a mix of really long fleece lousy with bits of crap that take a lot of work to remove and short very soft fleece.

I tried spinning some of the lamb's wool a while back. It's a slow and frustrating process resulting in a weak thread that's hardly worth using.

That's why this fadge ended up in the garden shed being mostly ignored while I worked with the better fleece.  I say mostly ignored, because whenever we wanted something from the back of the shed, we'd have to move it or climb over it awkwardly and swear about it a lot.

I decided a few months ago to go hard and get this one done.  Get it sorted and out of the way.  I washed it.  It wasn't nice fleece for the most part.  Some of it is more like hair, some of it is matted to the point where I can't separate, comb or card it.  Some of it is permanently stained with sheep sweat (or to use the proper name, sanit) so it has a orange/tan tint.

I could toss it into compost.  I could ditch the lot.  It's pretty rough.  But I just can't do that.  I hate waste, surely there was still a use I could find for it.

I've been making blankets out of my coarser wool.  Everyone has a blanket, except Dad, he doesn't like the weight, the rest of us love them.  My youngest granddaughter isn't even in a bed yet and I'm already most of the way through her blanket for when she graduates to a big girl bed.

I'm running out of people to make blankets for.  I could make them to sell, but I don't think anyone is really willing to pay enough to make it worth my while and certainly not what they should be worth.

It occurred to me that we could use some rugs.  The rug we have on the tile floor in the entranceway isn't really the right size or shape.  I could make rugs.  I learned how to latch hook a rug years ago, my great-grandmother did a lot of it and while I don't think I learned from her, I picked it up somewhere.  There's also another style that I don't know what to call.  Dad used to do a lot of it, it's a series of loops poked through fabric (he always used hessian sacking).  You can either leave the loop or trim/shave it to the length of pile you want.

I presented this idea to Hubby. He didn't like the thought of any of those rugs and instead suggested a simple woven rug. I can do that.  I have a loom.

I got to thinking and planning.  I could use this awful wool and spin it big, uneven and chunky and that would make it even better for a rug.  It would give it a textural element that seems to currently be the big thing on all the home renovation shows.  Spinning chunky and uneven will also be quite quick to do.  If extremely challenging.

I'm a self-taught spinner.  I've watched a YouTube video here and there and read bits in books, but most of it has come from trial and error over about 8 years of practice.  I've spent that time refining my technique and getting a lovely fine and even thread.  So to deliberately spin 'badly' did my head in for a bit.

I started spinning in preparation for a rug.  I was a few balls ahead of the blanket I'm working on for the youngest granddaughter so I had time to spin.

Hubby was working on the hallway.  I banned any new major renovation projects over these Christmas holidays.  None of the previous projects have been completely finished.  The kitchen needs another coat of paint and some finer detail finishing.  The lounge needs some major decisions made regarding a new fire, walls fixed, skirting boards and the carpet laid properly.  Miss 14's room needs some finishing details.  The hallway had the floor replaced at the same time as Miss 14's, but nothing more had happened there.  I put my foot down and said I wanted to see some stuff finished before anything new was started.

The remaining wall paper was stripped and the walls plastered and pigment sealed.  The cupboard doors have come off, been tickled up where they used to be tight (particularly the high cupboards) and the linen cupboard is finally getting a door.  It's mostly down to painting and finishing now.

I suggested the rug I was going to make as a runner for the hallway.  We've gone for very light colours in the hall because it has no natural light of its own and is often a very dark space.  A creamy coloured rug running along the length on top of the fairly dark carpet will help lighten the space.

So to Hubby, it's a race now.  Whether he finishes the hall ready for the rug before the rug is ready for the hall.

I measured the hall and started to prepare the loom for spinning.

I fell down the rabbit hole of weaving.  Heddles and reed, warp and weft.  The jargon on its own can be pretty daunting.  Never mind the actual process and my own inexperience.

I've learned that there is a lot of warp wastage when using a loom.  Warp is the long threads that run from back to front through the heddles and reed.  The warp is the starting point.  You work out the length you need, add some and work it out on the warping mill.

For a 3 metre length, I wanted to start with about 5 metres just to be safe.  I worked this out on my warping mill and started measuring and threading the warp threads through. Hubby stopped what he was doing to help.  This made it a lot easier as I was having to go back and forth for each thread.

I decided to stop before I got to the full width of the reed.  The threads were looking rather tight on the reed and I thought it would probably relax wider when it was woven.

Threading the warp is the longest part of weaving anything.  It takes hours and days.  Each individual thread needs to be untangled from the rest (because you take 30-50 odd 5.6m lengths of woolen yarn, knot it around the rod on the back drum and it tangles itself in protest), poked through a small hole in the heddles, after making sure you've got the right shaft, threaded through the reed making sure you have the right dent and pulled all the way through.  When you've done each bundle, you slip knot it into a bundle to stop it from tangling up too much.  Rinse and repeat.

Warp threads attached to the rod at the back.

Through the heddles
Through the reed and slip knotted
Once that's all done, you undo the slip knots, lay out the long warp threads and wind the back drum up to pull the threads most of the way through.  This was a long and painful process.  The yarn didn't slide through easily like it has previously.  It became uneven and bunched on the drum.  Hubby helped me fix this, one thread at a time.  You also have to keep untangling the threads as they pull through the reed, because as we found earlier, they tangle themselves up constantly.

When you have it mostly onto the drum, you can then tie the ends around the rod on the front drum.  As I learned when I first set the loom up and played with it, you need to leave it until last, as it doesn't matter how well you think you've measured it, it ends up at uneven lengths.

So we did this and tried to start weaving.  The reed didn't want to move.  The entire loom was lifting as I tried to move it forwards and backwards.  The reed was too fine for my wool. 

Luckily I got three more reeds with my loom.  All of which had wider dents (slots) than the one I'd been using.  With Hubby's help, I untied all my threads from the front drum and pulled them through the reed.  I removed the reed and tried another.  I threaded approx 75 threads through and measured the width.  This was too wide, so we tried the one sized in between the two.  We had to remove about 40 threads but at least it worked.  I was finally able to start weaving.

Fortunately, the actual weaving is quite quick.  In only a few hours I've woven 2 metres of rug.

I love how it's working up and can't wait to see it finished.  I will give it a hot wash to hopefully shrink and felt it a little.

Weaving in progress
A close up of the weave


Friday, 15 February 2019

Homespun Blankets

My sheep have mostly come from Texel stock.  Texel wool is not as fine and soft as most wool breeds, in fact, Texels are mostly considered a meat breed and their wool is not valued.

I refuse to let this mean that a large portion of the wool from my sheep is no good for anything.  I'm stubborn like that.  I had made socks from my homespun wool, they were stiff and a little scratchy, so I wasn't going to even think about knitting a jersey from it.  Although, I have learned that using bigger needles makes them less stiff and I have knitted jerseys from some of the softer, finer wool.  I started thinking about what I could make with all of this wool that wouldn't necessarily be next to the skin.

I found tutorials online for Corner to Corner (often abbreviated to C2C) crochet.  They sit nice and flat, much better than a Granny Square blanket.  The edges stay straight and even, much better than any other type of crochet I've ever tried.  They work up easily and can safely be stopped and put aside in the middle of a row as they don't require any/much counting.

I noticed, rewatching the tutorial that I've linked to, I do them slightly differently.  I use trebles rather than doubles, but I start with the same chain of six and use the same chain of three when I start a new cluster.

I made a blanket or bedspread for my bed.  We have a King Size bed.  I tried to work it out as approximately 3m sq to allow for the blanket to hang over the sides and foot, but this has come out somewhat bigger than that.


It was a wonderful thing to work on over winter.  Especially once I reached a point that it could cover my feet.  The down side was it was huge and heavy and turning it over to do the next row required standing up and juggling several balls of wool and often, shifting the cats who loved it too.

Those are my feet underneath - I had the foot rest up on the lazyboy.

It's a great blanket on our bed in winter.  It's heavy and warm.  It's now the only blanket we add to our bed for the changing season.

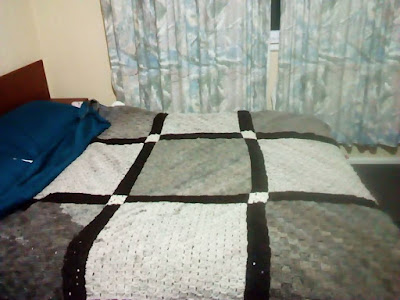
Very quickly, my children wanted one each too.  I vowed and declared that I would NOT be doing another one all in one piece, so I made one in squares that I joined with separate stripes.

Queen sized bed.

Making this one, I learned just how much I really hate sewing pieces together and trying to match up the patterns between them.

So for the one I made for my son and daughter-in-law, I chose to compromise.  This was made in four full length panels.


This allowed for some fun reversing of direction up the middle, which they both loved.

I have also made a smaller blanket out of acrylic yarns for my Granddaughter, but I can't seem to find a good photo of it - I'll provide one when I can.

Next on the list is one for my oldest daughter and son-in-law and then another for the grandchild on the way.

Each one takes months to make. They weigh at least 5 kg and use approximately two whole fleeces each.

We love them.

Monday, 16 November 2015

Knitting a Homespun Woolly Jumper

Since I have a mountain of coloured wool that was given to me, I thought it was about time I started knitting more than socks with it.  My self-taught spinning has reached a point where I'm a lot more satisfied with the evenness of my thread, although it's still not to a stage where I'd enter it in the A&P show.

I decided that Hubby needed a nice warm jersey.  He gets a bit snobby about handknit jerseys and would never consider one for "nice going out" wear, they're for home use only, but I can live with that.  There's no way he'd wear one in white or the silvery grey that I've got, so it had to be the dark brown.  I was quite curious to see how the colour would come out once it had been spun and knitted.  There is a mix of greys in with the brown and the gold coloured ends were intriguing.


The fleece before carding and spinning.


We had several discussions about how thick and heavy he wanted it.  I made the choice to make a 3-ply yarn for it.  Now when I say 3-ply, I'm not talking about anything close to commercial 3-ply.  A single of my spinning is probably similar in size to that.  I mean three of my singles plied together.  It's come out something similar to a commercial triple-knit or 12+ply.

A ball of my triple ply homespun.

The next issue I run into is seams.  I hate sewing seams on my knitting.  I have a fear that regardless of how well I pin it or mark it (unless there are stripes to match), I'll end up with puckers and stretching and uneven seams.  I also have a thing about measuring each side right.  Because just smoothing out a piece can change it's measurements, I'm rather paranoid that my sides won't truly match without a creatively uneven seam.

So this time, I chose to knit an entire jumper circular.  This took out any chance of uneven pieces and messy seams.  The only seams are at the top of the shoulders because there was no avoiding that no matter how hard I tried to come up with a solution.  I even knitted the sleeves circular.  I picked up stitches along the armholes and reduced down the length of the sleeve finishing with the wristband, rather than the other way around as is usually done.


At times, especially as I reduced down to the wristband, the sleeves were extremely challenging.  Having a long circular needle meant I had to get creative with where I pulled the excess and still be able to knit effectively.  Towards the end, I was needing to adjust it every 5 or 6 stitches, but it worked and worked well.

A sleeve almost at the wristband.
I used threads of different colours to mark the start point and halfway (or the other side).  Those threads continued down the sleeves to mark where I was reducing.

One of my markers.
Knitting an entire men's jersey this way certainly raised some interesting challenges, but I'd do it again, overall I found it far easier to do and work with.


I didn't work to a pattern as such.  I measured up his favourite but battered sweatshirt and worked to it's measurements.  I had to redo the sleeves as they ended up far too baggy and too long as this seems to be wider at the shoulder than his sweatshirt although both seem to have the same straight drop shoulder cut.


Thursday, 20 August 2015

Perseverance and Spinning Madly

I think I mentioned it elsewhere, I have been given a lot of unwashed fleeces from both sheep and alpacas.  When I started working on the alpaca fleece, I didn't realise it hadn't been washed until I'd carded the lot and then started spinning.  It was when my fingers turned black from working with it that I realised.

I still haven't gotten very far through the alpaca fleece. And I've only washed two or maybe three of the sheep fleeces I was given before the weather and drying conditions turned against me.  Meanwhile, I have a small mountain of washed fleece waiting to be spun, so I've been trying to get through it.

Washed sheep's fleeces waiting for carding and spinning.


One of the alpaca fleeces though caused a rather rare (for me) ragequit.  I actually took the bobbin off the spinning wheel and threw it.  The wool is short and soft, rather like persian cat hair.  It doesn't spin up nicely at all, regardless of how short my draft is and the thread breaks constantly.


Bloody awful alpaca fleece


This is how it spun up.


It sat in time out in my spare room while I rather resentfully pretended to ignore it and treated it as a betrayal of my trust, while I hoped it learned it's lesson.

I hate waste though.  I hate giving up on something.  I hate finding out I can't do something.  So it sat in the back of my mind while I tried to figure out how to win this battle.

Then it occurred to me to blend it with the much longer and sturdier texel fleece.  Slap forehead, D'oh.

It's terribly obvious as a solution really, but I hadn't been thinking like that. 

It also meant that Hubby could get his socks that aren't creamy white and stop being so obnoxious about the colour of his socks.  It's not like he wears shorts often enough that woolen socks would be visible anyway.

Blending it is fairly simple, I start with some of the texel fleece on my carding comb and add a rough layer of the alpaca fleece and card back and forth until there are no big obvious blobs of brown.  Once it's spun, the colour is uneven, but I think this is a funky feature and we all like it.

Texel fleece on carding comb.


Add some alpaca fleece.


Start carding back and forth to mix up the colours and fleeces.


Sufficiently blended for me.


A rolag ready to spin.


This is how it spins up - this is still a single and not plyed.


So far I've made three pairs of socks with this.  The alpaca fleece makes them warmer and snugglier.  I've had to start adding special stripes so we know whose is whose.

Same yarn knitted into a sock.


Two stripes is Miss Nine's sock.


Thursday, 21 May 2015

Knitting Needle and Crochet Hook Conversion Charts

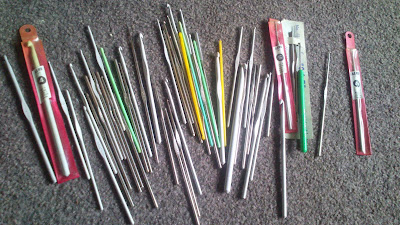
A while back I wrote about inheriting boxes filled with Grandma's craft stuff.  I have more knitting needles and crochet hooks now than I think any one sane person should own, but I can't quite make myself give any away or sell the clearly vintage hooks.

This isn't all of them.


The challenge comes from trying to understand exactly what size some of them are.  This gets worse with some of the hooks when their marked with a 5 and seem to be about 5mm.  Actually, they're a UK size 5 hook which is really 5.5mm.

Fortunately for me, I also got this wee gadget that is especially helpful with sock needles that have no markings whatsoever.

Metric side

UK side

For everything else, there are these charts below.  I thought them worth sharing because sometimes I can't remember if it's a 10 or 11 needle I need right now and it's difficult to tell the difference with the naked eye.

Knitting Needle Conversion Chart


Metric (mm)
US    
UK & Canadian
2.0
0
14
2.25
1
13
2.75
2
12
3.0
-
11
3.25
3
10
3.5
4
-
3.75
5
9
4.0
6
8
4.5
7
7
5.0
8
6
5.5
9
5
6.0
10
4
6.5
10 1/2
3
7.0
-
2
7.5
-
1
8.0
11
0
9.0
13
00
10.0
15
000
12.0
17
-
16.0
19
-
19.0
35
-
25.0
50
-


Crochet Hook Conversion Chart


Metric (mm)
US
UK & Canadian  
2.0
-
14
2.25
B/1
13
2.5
-
12
2.75
C/2
-
3.0
-
11
3.25
D/3
10
3.5
E/4
9
3.75
F/5
-
4.0
G/6
8
4.5
7
7
5.0
H/8
6
5.5
I/9
5
6.0
J/10
4
6.5
K/10 1/2
3
7.0
-
2
8.0
L/11
0
9.0
M/13
00
10.0
N/15
000