Showing posts with label recipes. Show all posts

Sunday, 20 March 2022

Black Grapes

 For the last few years, I haven't gotten any grapes. They were growing just fine, quite abundantly in fact, however, the birds were eating them all before they'd even showed signs of ripening.

So last year, I decided to put up some bird netting.  It was quite the mission to net over and under the grapevines growing over the arch.

We spent several months watching the grapes grow and ripen.  It was quite impressive just how many there were and the sizes the bunches were growing to. The odd thrush managed to make it's way inside the nets and usually had to be helped back out.

Miss Fifteen and I picked a bucketful and barely touched the grapes that were there.  

I washed and weighed some trying to decide how much would be Black Grape Wine. The thing is, the huge volume of wine I made four years ago has barely been touched.  I've used it more for cooking than I have for drinking.  More of it has been gifts.  I didn't want to make a heap that would just end up getting dusty in my wine rack.

So I used 6kg of grapes and made about 16 litres of wine.

That left about 6kg of grapes still from the first picking. I didn't want to waste them, so I decided to make raisins.  I've done this previously as an experiment.  Unfortunately, since my grapes aren't seedless, this is quite a labour intensive process.  I cut each grape open and remove the seeds before putting them into the dehydrator. 

So approximately 12kg of grapes has become 16l of wine and a 1.5l jar of raisins.  I still had at least four times the amount of grapes still on the vine.

Hubby suggested Grape juice.  I went Googling and found a recipe.  It started very similar to starting wine.  Wash and mash grapes but then it said to boil them vigorously for about 20 mins. Add sugar to taste and strain gently overnight.  It said that it didn't keep for too long and wasn't particularly nice if frozen.

I was talking to a friend before I had the opportunity to try it.  He told me his grandfather used to make the most amazing grape juice but he never boiled his.  It was a very long slow process and would keep for years.

I decided to try it.  I washed the grapes and filled my stock pot.  No water added except for where the grapes may have still been wet from washing. I turned my pot on very low and watched as the grapes gradually reduced to pulp, seeds and juice. I kept it going for hours and gently strained the juice out.  When I say gently strained, I mean that there was no squeezing or pressure.  I would put a few cupfuls into my muslin lined sieve and let it strain until it stopped dripping.  I would then return the pulp to the pot and do it again until there was no more liquid in my pot.

An 8 litre stock pot filled with fresh grapes became 1.5l of grape juice.  It's a little thick and syrupy but not unpleasantly so.  It didn't need any sugar added, it tastes wonderful as it is.

I looked at the colour in the pulp and wondered if I could still use it.  I know that it's the skins that give wine it's colour, so out of curiosity, I refilled my pot with water and the leftover pulp and heated it gently in much the same process.

It has come out just as dark as the grape juice, so we'll see how it goes as a dye.

Grape Juice

Washed grapes

Place the grapes in a large pot and heat very gently.  They will reduce by about half.

Strain without squeezing, sweeten if needed and bottle.

Sunday, 27 February 2022

Elderberry Lozenges

Elderberry Lozenges


1.5 litres of water

Approximately 1.5kg elderberries

3 C sugar

1 tsp cream of tartar

1 tsp butter

1 tsp lemon juice


Combine water and berries in a large saucepan.  Bring to the boil. Reduce heat and simmer for 30 minutes.  Remove from heat, cover and let stand for approximately 30 minutes.


Strain, discarding berries and reserving the liquid.


Combine liquid, sugar and cream of tartar in a medium saucepan.  Slowly bring to a boil, stirring until sugar dissolves. Cook, without stirring until mixture reaches 104˚C (220˚F).  Add butter, do not stir.


Continue cooking without stirring, until mixture reaches hard crack stage (150˚C - 300˚F).

Add lemon juice (do not stir) and gently shake the pan.


Pour syrup into buttered dish.  Allow to cool a little, until you can pinch off a piece without it being too sticky.  Roll into balls or spoon into moulds.  Cool until firm and wrap.


The original recipe said to mark in 1” squares and cut or break when completely cool.  I tried this the first time and ended up with a solid glass-like mass that would not break apart.  I had spent about an hour running the knife through to mark the squares and then couldn’t lift them out of the dish.  I had to reheat the entire batch and try again.  This is why I shape them into balls (which generally flatten) or pour into moulds.


If kept in the fridge, the lozenges do stick together a bit, but are easily pulled apart.  If stored in the pantry, they gradually meld together into a jar shaped mega-lozenge. I still have two jars of horehound candy waiting for me to reheat and reshape them.


I wrapped the most recent batch in gladwrap.  It made it a long and painstaking process, but they are magic for a sore throat so I feel it was worth it.

Any herb you may be wanting to use can be substituted in for elderberries.  

Friday, 29 March 2019

Sweet Chilli Sauce

Hubby loves sweet chilli sauce.  Last year he asked me why I don't make it for him.  Well, um, I guess it's because we don't grow chillies?

So we bought some chilli plants in spring and Hubby planted them among the capsicums and tomatoes.  He thought he'd kept hold of the labels telling us what type of chillies and peppers we'd bought, but it would seem not.  Or if he did, we have no idea where they've gotten to. We seem to have a mix of banana peppers, bell peppers, long red chillies and some that look like a small bell pepper - a little smaller than a golf ball.

Since the chillies have started ripening, I looked for recipes for Sweet Chilli Sauce.  I found one embedded in a blog that seemed great on the surface, but as I got deeper, it used Sambal Oelek, a pickled chilli jam, that I don't have, instead of chillis which I do have and want to use. Using them was kind of the point of the exercise. So I carried on looking.

I found one on Taste.com.au, it seemed simple enough so I thought I'd try it.

The only problem was the proportions.  My seven chillies weighed a grand total of 40g, the recipe called for 500g.  That was quite a bit different.  So I added approximately 60g of capsicum to make it up to 100g, much easier to convert the recipe then.

It cooked up quite quickly, I didn't simmer it for the full 30 minutes in the recipe and ended up with about a cup of hard chilli jam.  A very hard chilli jam that was almost inedible.  The tiniest bit on the edge of a teaspoon was enough to set your mouth on fire.

So I left it overnight while I considered my options.  Today, I blitzed up two whole bell peppers and made it up with the full amount of white vinegar and sugar in the recipe, as the sugar dissolved, I added my hard fiery chilli jam from yesterday and stirred it around until it dissolved too.

After a taste test, I added more sugar.

We've tested it tonight and it's sweet and it's spicy.  It's got a nice bite of heat to it without being overpowering.

So now I'm watching my chilli plants so I can make more.

Sweet Chilli Sauce

50g hot chilli peppers
2 whole red bell peppers
3 large cloves garlic
750 ml white vinegar
3 1/2 cups white sugar

Halve and deseed the chillis and peppers.  Put into food processor with garlic and a little vinegar.  Blitz until almost pureed. Put into a saucepan with the remaining vinegar and sugar.
Heat slowly, stirring constantly until the sugar has all dissolved.
Bring to the boil, then turn down heat and simmer until it starts to thicken. Taste test and add sugar if needed.
Be careful not to allow it to thicken too much - the sauce should still run freely when cold.


Tuesday, 19 March 2019

Doing Things With Peaches!

A workmate and good friend of Hubby's has a very prolific black boy peach tree.  Every year we're given peaches and when we have pigs, buckets of bruised and windfall peaches.  Have you ever seen a pig eating these?  It looks like they've been taking big chunks out of each other, dark purple-red peach flesh dripping down their jaws.  It's really quite disturbing.


Hubby got these on Friday, the same day as his motorbike came back from the shop.  Our plan was for him to bring the motorbike home and as I was going into Christchurch for the weekend, I'd drop him back at work Friday night to bring his car home.

With the Mosque shootings on Friday afternoon, all those plans changed.  We didn't go back for the car (with a bag of peaches sitting in it) until late Sunday afternoon.  Probably half of the bag has gone to the chickens and they look just as dreadful eating them as the pigs did.

So today I started to do things with peaches.

Previously, I have bottled them in a light syrup.  I think I still have a few jars in the depths of my pantry, we don't eat fruit this way very often.  A few years ago, I cut them up and froze them.  They're still there in the freezer too.  I have to move them now and then searching for other things.

I wanted something I was sure I would use.

Out came the recipe books and searches through their dessert chapters.  The old books, which are usually my go-to for anything like this, yielded nothing that excited me.  I considered the peach souffle, but as I've never made a souffle of any sort in my life before, I chose to try it another time with a simpler version.  Peach Flummery sounded interesting, but I didn't have enough cream or gelatine on hand.


Into the bigger, flasher and newer cookbooks I dove.  One had peach muffins.  The next had a peach crumble.  We like crumbles, they're simple and easy and adaptable.  I can freeze them.

The original recipe and inspiration came from River Cottage Gluten Free.  I'm a little wary of this book these days.  I made a cake from it about six months ago that had a lot of 'mix x, y and z together in a small bowl, then put aside'.  Six different bowls and a saucepan were required for this cake!  The cake was okay, but not anything overly special. So I read through the recipe carefully, looking for sneaky over the top dish usage.

I didn't have all of the ingredients, but crumbles are fairly adaptable.  Below is my interpretation.

Peach Crumble

Peach Filling

Approx 800g peaches, stoned and cut into chunks.
Brown sugar to taste (depending on how sweet the peaches are)
30g butter

Crumble Topping

150g hazelnut meal
75g brown sugar
30g sorgham flour or psyllium husk
30g potato starch
1 tsp ground cinnamon
60g butter

Preheat the oven to 180 deg Celsius.

Put the filling ingredients into a saucepan. Heat gently until the peaches have softened and the butter and sugar have formed a thick sauce.

Put the dry crumble ingredients into a food processor and blitz to mix.  Add butter and process until butter is fully rubbed in.

Pour or spoon filling into dish and spread crumble over top.  I like to get handfuls of the crumble and sprinkle it around and around until the fruit is completely covered.

Bake for 40 minutes.  Best served warm.


Thursday, 7 March 2019

Easy Cheesy

There are a few simple and quick cheeses that anyone can make.  Here I've given recipes for my favourite three.

These cheeses don't require culture or specialised equipment, most ingredients are things that can easily be found in the average kitchen.

Be aware that your finished cheese will be about 10% of the milk you start with.  If you start with 2 litres of milk, you can expect approximately 200g of cheese.

In the first two recipes, the curdled milk should look like this.


Queso Blanco

Queso Blanco is very much like ricotta, in the process and in the finished product.

Bring milk to the boil, stirring to avoid scorching as much as possible.  Very slowly pour in white vinegar, while stirring, until milk curdles and separates.  Make sure that it has separated completely into white fluffy curds and green whey.  If it's just like grainy thick milk, add more vinegar and keep stirring.

Let sit for about two minutes then pour through a cloth lined colander.  Strain until there is no more liquid to come out.

Add salt, garlic and/or olive oil to taste and use like ricotta.
This doesn't keep very well, I'd recommend using it within a week.

Cumin Paneer

I make this one often for my Hindi friends.  I'm told it can be frozen, but I haven't tried freezing it myself.

The recipe I started with said to strain it through a cloth lined colander, twist the cloth around and weight it down.  This made the finished cheese a rounded ball.  My Hindi friends are used to buying it in a square shape, and say this makes it easier to cut into cubes and use.  My solution was to use a cloth to line a feta basket and make cube paneers.

The addition of salt and cumin not only gives this rather bland cheese some flavour, it extends it's keeping time.  This should stay good for about 2 weeks.

My original recipe used lemon juice.  I found myself out of lemons at one point, but my lime tree was so prolific, they were falling all over the ground underneath the tree.  So I tried lime juice and it has worked just as well.

For every 2l of milk, add a tsp of non-iodised salt and a tbsp of cumin seeds.  Bring to the boil gently, stirring constantly to minimise scorching.  Let it boil for 3 minutes before adding lemon or lime juice.  Pour citrus juice in slowly until milk curdles clearly into white fluffy curds and green whey.

Ladle into a cloth lined colander (or cloth lined feta basket).  It may take some time for it all to settle, so be prepared to come back every so often to add more, but try and get it all in while it's still hot.

Fold cloth over and turn upside down in the basket.  If you can find something square to weigh it down, this makes a better, firmer cheese.


Mozzarella

True Mozzarella is made with buffalo milk.  This recipe uses ordinary cows milk.  This recipe also requires liquid rennet.  There are several varieties available in more places than you'd think.  I often buy mine from Bin Inn (various cheese cultures and equipment can also be bought there) but there are plenty of websites that sell rennet fairly cheaply.  Make sure that you are buying either calf rennet or vegetarian rennet and not junket rennet.  Junket rennet is often sweetened although most modern recipes for junket seem to use normal rennet.

I found that mozzarella doesn't keep very well, so I grate it and freeze it in zip lock bags.  This makes it easy to use on pizza and the like.

For every 2l of milk, you will need 1/2 tsp of citric acid.

Dissolve citric acid in 1/4 cup of lukewarm water and stir into milk.  Heat milk to 31 deg C, stirring gently to prevent scorching.

Dilute 1/4 tsp of liquid rennet in 1/4 cup of cool water, add to milk and stir in gently.

Cover and let set for 30 mins.

Check for a clean break.  This means run your knife through the centre of your curd and then either lift the split or pull to one side.  If a clean break has been achieved, the two sides should part easily and hold their shape.  The curd won't be firm, but will hold.  If the curd seems a bit soft or not set, let it sit for another 15 mins.

Using a long bladed knife, cut the curd into half-inch cubes.  I cut front to back and side to side, then turn my knife onto a fairly steep angle and cut the horizontal lines on an angle. I go back and forth with the knife about half an inch deeper down the side each pass.  It doesn't make true cubes, but cuts them into roughly the right size.  I turn the pot and do this four times to be sure I've got them all. Let stand for 5 mins.

Place pot over low heat and slowly bring the curds up to 41 deg C, making sure it takes 20 mins to get there.  The curd will have cooled slightly from it's original temperature, but you're looking at approximately 1 degree raised every two minutes.  Don't let it warm up too quickly. Stir constantly while heating.  Turn off the heat and stir for another 20 mins.  Let stand for 5 mins.

In another pot, bring fresh water to the boil.  At least 2 litres but 4 often works better.  Add non-iodised salt at a rate of 1 1/2 tbsp per litre and stir until dissolved.

Drain whey from curd through a cloth lined colander.  Let the curds drain for 15 mins.

Place curds onto a clean chopping board and cut into 1 inch strips.  Place into a large bowl and pour hot salted water over.

Wearing heat resistant gloves, or using a wooden spoon, work the strips under the water until they become soft and pliable.  Knead, pull, stretch and fold it back on itself.  Keep working until the cheese becomes long and stretchy, it will also become shiny and smooth.  Work all the strips into a single large ball or into small bocconcini sized pieces.

I found another recipe that recommends microwaving the curds in 30 second bursts until an internal temperature of 72 deg C has been reached.  I have used this method and it works, but can be messy and frustrating.

Place the cheese into a bowl of ice water for 5 mins. Drain on a paper towel.

Enjoy simple cheese making!

Thursday, 21 February 2019

Pork Sausages

With the butchering of four pigs, came plenty of meat that was only good for sausages. Offcuts, trimmings and thick, tough neck meat.  Most of the trimmed fat (except for the fat around the shield) had gone into the sausage bucket too.

I have previously written about some of my trials making sausages, this time I was hoping to do things a little better and also hoping that I've learned a few things since then.

I had to buy some more sausage casings.  No idea what happened to the previous leftovers, they'd probably gotten old and been thrown out.  My awful dry sausages (some that no amount of gravy or sauce could make pleasant eating) had put me off sausage making.

While I was waiting for the casings to arrive, the sausage meat was bagged and frozen.  This was actually quite beneficial to the process.  If the meat and fat is partially frozen it tends not to render when it's being minced.

Dad had gone through his pantry and cupboards since Mum went into care.  If he comes across something he thinks I might find useful but he doesn't use, he brings it over.  Included in this was a mincer attachment that fits the old cake mixer he'd previously given me.  He thinks the mincer was Grandma's as he doesn't remember ever having or using it, and it has a piece of the foot broken off, so it's clearly had some use.

I am in love with this mincer.  It doesn't clog up when you're mincing meat.  It just keeps going and clears itself out.  I can put 2kg of meat through it in a very short amount of time and it does a great job.  There only seems to be one blade for it though, so everything is coarse or goes through the mincer several times.


The sausage stuffing attachment (a kind of large plastic funnel) from my old cheap mincer didn't fit this one, so Hubby and Dad decided to trim it down a little to see if they could make it fit.

No.  The outside edge of the funnel shape was too wide for the ring.  Now they've trimmed the edges down on it, it doesn't stay on the old cheap mincer either, so I have to stuff sausages by hand.  It's a little frustrating but I can cope.

So these days, I take about an hour to make 5kg of sausages from start to finish.  The sausages are much better than they were previously, although, I find that I don't really like the texture of the skin if it hasn't dried up completely in cooking.  It's a little thing though.

I wondered if I'm not drying them properly before I freeze them.  A later batch (since I first wrote this piece) was hung to dry in my pantry overnight.  They were far better and the pantry smelled amazing.

I've also learned that it pays to put the casings onto the sausage stuffing attachment approximately a metre at a time.  If you put too much on, it can dry out before you've finished.  The casings tend to break then and you waste a lot of them.

One last comment to make before I hit the recipes - I have learned to read the recipes completely several times before I make the sausages.  Some give the spice mix first in specific quantities, but it's easy to overlook that you are only using a small amount of your made up spice mix to x volume of meat.  My first batch of English Bangers are not for the faint hearted, the spice mix is mostly white pepper and there is at least three times the amount there should be.


English Bangers

Spice Mix
5 tsp ground white pepper
2 1/2 tsp mace
2 1/4 tsp salt
2 tsp ground ginger
2 tsp rubbed sage
1/2 tsp nutmeg

Sausage
1 kg lean pork shoulder
1/2 kg fresh pork fat
1 1/2 C dry bread crumbs
1 1/4 C chicken broth (I make up a stock cube)
3 1/2 tsp Banger Spice Mix

Grind pork and fat together.
Add Spice Mix and other ingredients and mix well.
Grind again.

Stuff the mixture into casings and tie in 4-5 inch lengths.

Chorizo

I've found lots of variations in recipes for chorizo.  Rick Stein always talks about the paprika in it, but half the recipes don't seem to contain any.  The notes on sausages that I got somewhere (I never noted down the source) speak of the differences between Mexican and Spanish chorizo and also say that the casing should be removed and the sausage crumbled before cooking.  I can't speak to the authenticity of such a statement.  It doesn't fit most of the times I have seen chorizo cooked.

This recipe might not be authentic, but it's my blend of several and works for us.

1 kg lean pork trimmings
1/2 kg fresh pork fat
vinegar
2 medium onions, quartered
8 cloves garlic, pressed
1/2 C cider vinegar
2 tsp paprika
1 tsp ground cinnamon
1 1/2 tsp ground cumin
1 tsp ground oregano
1/2 tsp cayenne pepper

Rinse the inside of the casings with vinegar before using.
Grind the meat and fat.
Grind the onions and garlic and mix with other ingredients to taste. Mix into meat.
Grind all again together.
Stuff the casings and lay them out on a cookie sheet covered with baking paper and refrigerate.  Allow flavours to develop for at least 8 hours before using.

Pork and Thyme Sausage

1 kg lean pork trimmings
1/2 kg fresh pork fat
2 medium onions
Salt and pepper to taste
1 tbsp dried thyme

Grind meat and fat together.
Grind onions and add to meat mix with other flavours.  Mix well.
Grind again.
Stuff into casings.

This recipe works as a lovely breakfast sausage.

Pork, Ham, Bacon and Salami

All four pigs were living quite happily in their pig run plus extensions for a couple of months.  The extensions were areas that butted up against the pig run, they had grass reaching too high and nothing else of value in there.  Hubby and Dad would make a new fence out of timber and corrugated iron and extend the range of the pigs.

After the first few escapes, we added a hot wire to the top as well.  It's incredible how much damage four pigs can do to a lawn in a very short space of time.

Determined pigs also learned to dig out stakes and if they push hard enough in the right spot, they can tear the nails right through the corrugated iron.  And there went 15 tiny Hazelnut trees that had survived all our usual neglect for the past year.

During the last escape, Sour Cream nipped at me as I was trying to coax them back in.  You couldn't call it a bite, it didn't hurt, it didn't do any damage, he barely made contact with me.  But he scared me.  A lot.

It was time for them to become dinner anyway.   They were already a month or two older than I'd planned on letting them get to and this was the push I needed.

The Homekill man was booked.  I planned to butcher them myself because sending them away for processing is expensive.  Last time I checked, it was $5/kg plus extra for bacon, ham and sausages.  I was fully aware of my limitations.  We would get two done now and the other two maybe a month later.  Four pigs in a day would have just about killed me.

Hubby, Dad and I discussed the processing.  I had said months earlier that I'd like a smoke house or the ability to smoke some cuts from these pigs.  Plenty of research was underway. Did we want cold smoking or hot smoking? Were we planning to smoke for flavour or to preserve the meat?  Hubby came home just before Christmas with a smoking gun bought with his FlyBuys points.  Dad started reading hunting magazines that contained instructions on how to build your own smoker and the best options for different types.  A workmate of Hubby's had a fridge that no longer worked, so that came home with the intention of turning it into a smoker.

As there is always plenty to do on our little farm, nothing had really progressed towards the smoker when the first two pigs were slaughtered.

I have had a number of issues over the past few years with my back and shoulder.  I have learned not to overdo things as that will leave me almost crippled for the next few days.  I am usually pretty good at recognising when I've done enough for now and taking a break.  That break might only be 20 minutes, but it leaves me fine to carry on.

With this in mind and with warnings from friends about overdoing it, I set out to butcher these pigs.  I think I took too many unnecessary breaks out of fear and the end result was that it dragged out my day to the point of complete exhaustion at 11pm when I finally finished and the clumsiness that always comes as a result.  Only one nastyish cut though.

It was also dragged out by problems with the reciprocating saw I'd planned to use to cut down the spine.  The blade was in correctly, but kept popping out and flying across the shed when in use.  The handsaw I replaced it with had some damage to the handle that meant by the time I was halfway through the first pig, the fleshy part of my hand, between thumb and first finger, was bruised and swollen.  I gave up and boned each section as it was hanging.  This became awkward and painful and more time consuming.

Dad looked at the reciprocating saw later, the locating pin had worked itself partway out, so it wasn't doing its job of holding the blade in place.  It was a tool issue and not an operator issue.

I still had ham and bacon cures from when I'd previously had pigs and I dug out the salami kit I'd bought back then but never used.

My book on preserving had quite a variety of curing methods but most also required hanging each cut in a temperature controlled curing chamber for several weeks to several months.  This was something I did not have, nor did we have the time or resources to build one.

I was quite curious to see how the bacon especially would turn out.  My last lot of bacon was made with kunekune pork and was rather unpleasant on the whole.  I wasn't sure if it was the process or because the pigs had been a few years old and were rather gamy as a result of their diet.

Two legs, which I had boned, went into the brine for ham.  It was a week before Christmas and I hoped that this gave us long enough for the cure to work its way through.  The calculations on the recipe suggested it should be enough, but I'm never entirely confident until I've cut the finished product.

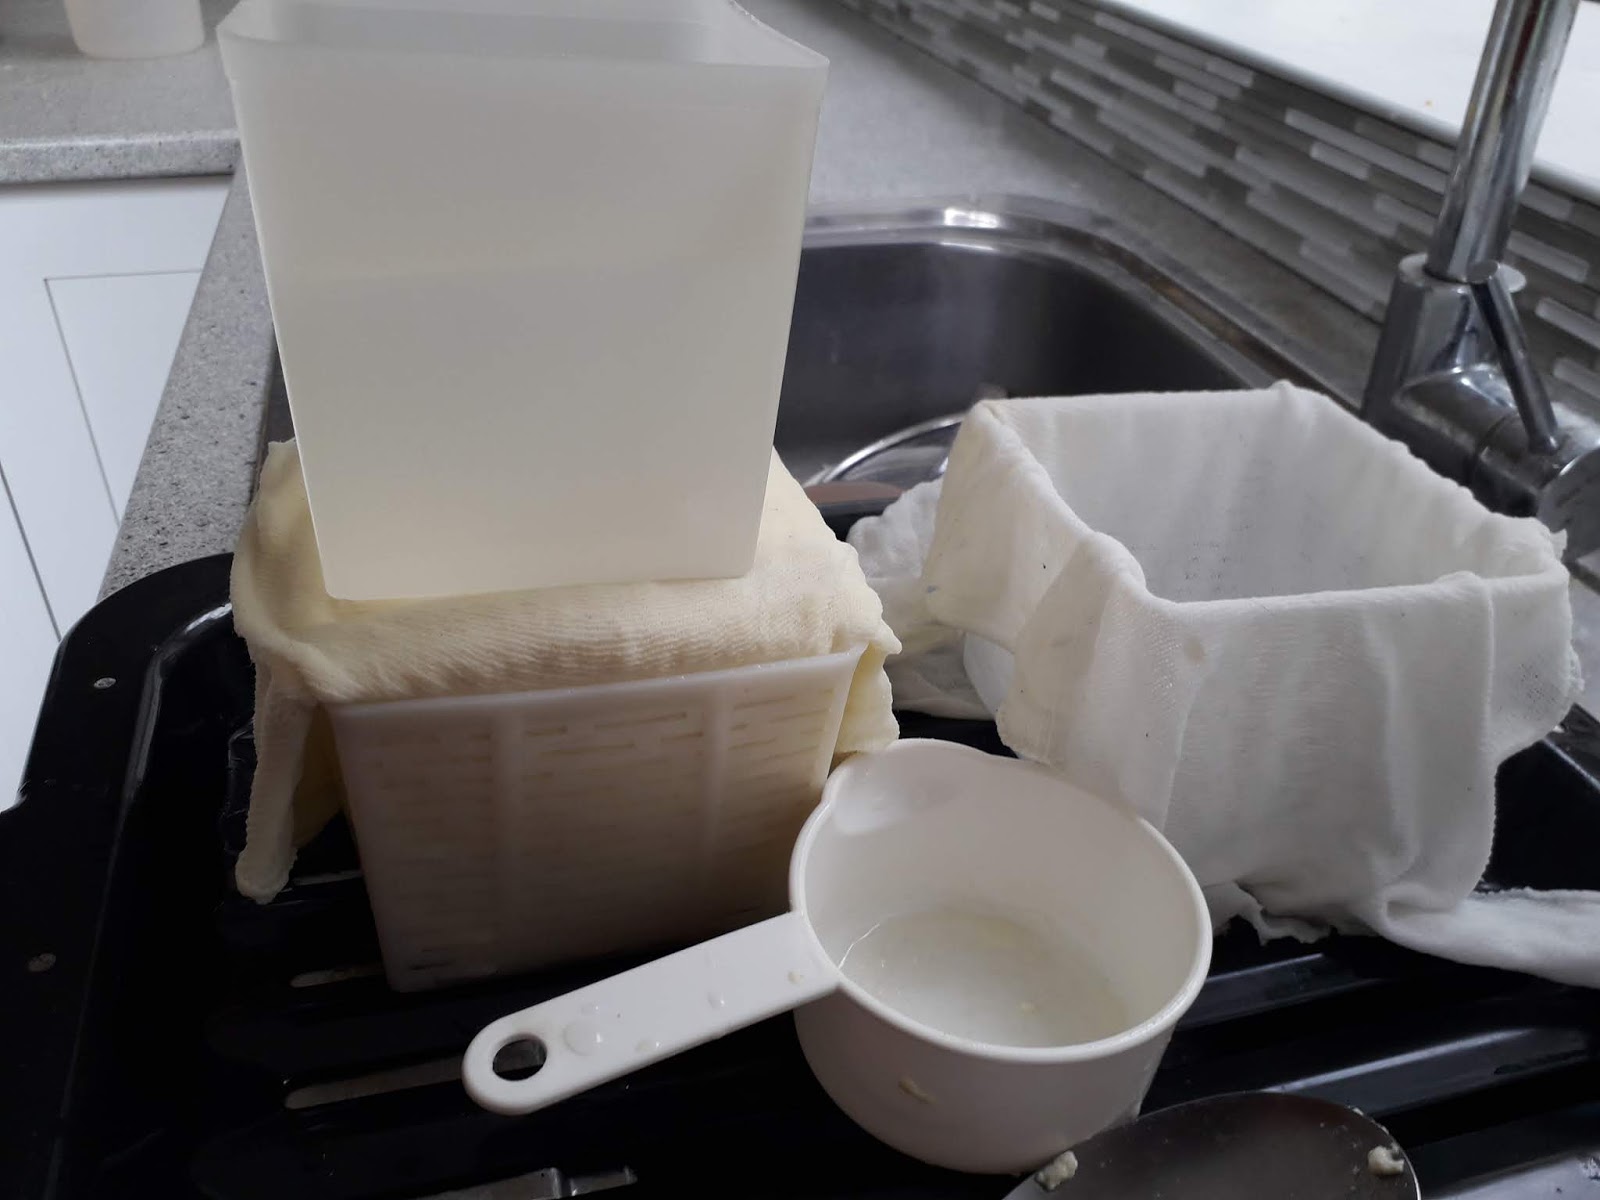
I boned the shoulders and put them into a brine for bacon.  My 15l bucket wouldn't hold all of it, so a couple of pieces went into the freezer for another time.

I decided to try making the salami.  The recipe called for beef as well as pork, so I hauled beef stewing cuts out of the freezer and used some of the pork I'd put aside for sausages.

The salami casings were a lot bigger than I'd thought.  They were at least 50cm long and about 4cm in diameter when stuffed.  Each weighed approximately a kg.

The recipe called for them to be smoked for at least an hour.  The smoking gun came out.  I followed the directions for covering the salamis in a large bowl with cling film, with the end of the smoking gun tucked in and sealed around.  I used the hickory chips that came with the gun.  We very quickly spotted the fine holes and places where it wasn't sealed very well, so they were fixed up.

Within 20 minutes, the smoke had all dissipated in the bowl.  So we filled it with smoke again.  And again after another 20 minutes.

The recipe then called for the salamis to be poached in water.  That water was to be kept below 85 degrees Celsius for one and a quarter hours, to allow the internal temperature to reach 70 deg C.

My biggest stainless steel bowl was not wide enough for the entire salami to fit under the water. I heated them (on a double boiler type system) for several hours longer than the recipe said.  I wasn't able to check the internal temperature as that would have put a big hole in the casing.  I hoped for the best.

The salamis had broken and bent in the middle.  All the fat now coated the outside of each salami inside the casing.  They looked okay inside, but I should probably have minced them with a finer blade and stuffed the casings more firmly.  They tended to crumble a little when cut.

Just to be safe, I fried slices to eat them.  Delicious.  A month or so later, I decided to try some without frying.  Still delicious, if even more crumbly.  It's almost spreadable on crackers.  It's been a month now and I haven't gotten sick from them so we're quite happy with the way they turned out.

Dad worried that they hadn't smoked properly, so he turned up one day with a charcoal grill and smoker as an early birthday present.

The ham was delicious on Christmas day.  The rest was sliced up and frozen ready to be pulled out for lunches.  There were a few patches in the middle that hadn't cured.

The bacon was very nice.  Bacon is quite hard to slice so our slices were probably 8mm thick.  They're more like bacon steaks than bacon rashers so you only need one with your breakfast.

We decided it was time to try out the new smoker and smoke two of the pieces of bacon.  They need to sit out at room temperature for 12 hours to form a pellicle.  So that was overnight.  The next morning, I put the smoker together.  That was simple enough.

Everything I'd read said to be careful of what fuel you use as this may taint the meat.  Dad had gotten some charcoal briquettes with the smoker, made of coconut shell and therefore safe for smoking, but getting them started was not the simple task it should have been.  Methylated spirits poured over wasn't enough, no amount of carefully chosen cardboard or kindling worked.  Dad spent a patient half hour with a blow torch to get the charcoals started in the end.

To begin with, we put the damp wood chips in an aluminium foil dish on top of the coals.  They kind of blackened but didn't really smoke, so after a while, we just dumped them directly onto the coals.

We left it for most of the day.  The bacon didn't seem cooked as such, but its texture had changed.  And this lot tasted amazing.

Ham (wet brine method)

3/4 C salt (non iodised)
1 C Brown Sugar
1/4 C Molasses
1/4 tsp ground cloves
3 tsp Prague powder #1

Mix in warm water.  The salination of the brine is right if a fresh eggs floats when placed in it.  If not, mix equal parts of brown sugar and salt and add until the egg floats.

Place ham in brine and ensure that it is fully submerged.  Place in fridge for 1 day per kg (or 7 days per 4cm thickness).

Check the cure has gone right through the meat.

Rinse ham and let soak in clean water. Check for saltiness by cutting off a thin slice, fry and taste test.  Ensure you check pieces from the bottom of your vessel - the ham at the top might have rinsed well, but the rest might not.

Cook at 150 deg C until internal temperature of 68 deg C has been reached.

NOTES: This mixture is sufficient to cure about 10 kg of ham.
Be careful to add the water slowly.  If you add too much water, you might need to add more cure.  I use a 15l food grade bucket with lid to do this - the volume of water required is less than you might think and much of it spills out when you add the ham and weight it down.
I use a small bowl to hold the ham under the surface of the liquid.
I've found the time period listed in the recipe (1 day per kg) isn't quite enough.  I always seem to end up with small patches of plain pork in the centre of my hams.  I found another recipe that gave time based on the thickness of the ham and that is what I now go by.
Meat cured with Prague powder #1 must be heated before it is eaten.  For small goods that are not going to be heated, use Prague powder #2 and a different process.
I didn't have Molasses, so I added an equivalent volume of dark brown sugar.
If you have a different quantity to cure, a calculator can be found here.

Bacon (wet brine method)

1 part Bacon cure
1 part Salt (non iodised)
1/2 part Brown sugar

Mix and dissolve in warm water.  The salination of the brine is right if a fresh eggs floats when placed in it.  Let cool.

Place meat for curing in brine.  Ensure that it is fully submerged.  Keep in the fridge for 7 days per 4cm of meat thickness.

Check the cure has gone right through the meat, rinse in clean cold water and check for saltiness as above.

NOTE:
I buy my bacon cure from Oskarbutcher. This link gives its ingredients.
I smoke bacon after curing.  When I am sure it has rinsed sufficiently (and be sure to check the pieces at the bottom), I let it sit out overnight and then smoke it the next day.
Smoked bacon is easier to slice.
This same recipe can be used for a dry cure.

Rub the mix into the pork, making sure the whole surface is covered and make sure to work it into any holes.  Place the meat into a zip lock bag and leave in the fridge for 2-3 days.  After this time, rub the meat with the curing mix again and leave for a further 2-3 days. 

Check that the cure has penetrated all the way through the meat, rinse and check as for wet cure.

Salami

1.7 kg Beef or venison
0.8 kg Pork
0.5 kg Pork fat (back fat is the best)
300ml water
40g Oat or wheat fibre (optional)
180g salami mix

Mince the meat through a coarse plate.  Mix in water, fibre and seasoning.  Mince again through fine plate.
Stuff into casings.
Hang in smoker and dry for 20 mins, then smoke for 1 hour.
Heat in water (not to be over 85 deg C) for about 1 1/4 hour or until internal temperature is 70 deg C.
Cool in cold water for 2 hours.
Keep in fridge overnight.

NOTES:
I added Cayenne pepper and whole black peppercorns to this recipe.
I bought the Salami mix from Oskarbutcher, it contains a number of salts, minerals and sodium nitrite.

Overall, we were quite happy with the end products.  So I've been doing it all again with the second two pigs.

This batch of ham spent twice as long in the cure and we still ended up with a small spot that didn't cure.  At least this is a small spot compared with last time.

That pale spot is where the cure didn't reach.
Smoking the bacon was a bit different too.  Hubby poured the charcoals in for me.  I said to him that I thought he'd put far too much in, but he was sure I needed that much.  This meant that it got too hot and the bacon cooked as it was smoking.  I also bought some fire lighters and they started the charcoals very easily.

It was still very good bacon.


Lighting charcoals

With soaked wood chips

First layer of bacon in

Second layer of bacon in


Smoking away quite merrily

Monday, 3 September 2018

New Ice Cream Recipe with Variations

Finding myself with copious amounts of milk and eggs again, I decided to have some fun making ice cream.

Previously, I'd made French Vanilla Ice Cream but this time, I wanted to venture out and try something a little different.  I asked my family what were their favourite flavours and resolved to have a go at each of them.

I found a recipe for Chocolate Ice Cream online and gave it a go.  I didn't have enough chocolate so I added two heaped dessertspoons of hot chocolate powder.  I also noticed that it used half the eggs compared to my previous recipe and still turned out lovely and tasty.

Miss 12 asked for a mint choc chip ice cream.  I didn't have mint essence so I went outside and picked a large bunch of mint from my garden.  I washed the mint and stripped the leaves from the stems.  Instead of scalding the milk, I heated it slowly with the mint.  Strained, I used the milk and followed the recipe like normal.

It tasted kind of minty with a distinct "herbal" flavour.  It wasn't unpleasant and Miss 12 has been eating it, it's just not quite the same as the bought ones.

I wanted a rum flavoured ice cream.  I like Rum and Raisin, although my last purchase was rather underwhelming.  I didn't have any raisins, but couldn't see why rum wouldn't work on it's own.
In my first batch, I added rum at the end.  It was delightful.  Since then though, I've been adding the rum with the milk before heating - it has the flavour but not the alcohol content.

I also made a coffee ice cream.  For this variation, I put 4 heaped dessertspoons of coffee in my plunger and filled it with hot milk.  It made the slow addition of hot milk to eggs much easier as I simply poured from the plunger.

It got stronger after it was frozen.  It's all mine.  My Preccciousssss.

Berry Ice Cream for my daughter-in-law was made by simmering frozen blackberries until soft and mushy, then forcing them through a sieve.  I froze this separately from the ice cream and then mixed them together later making a ripple effect.

Hubby and Dad tried to ban me from giving it to her.  They decided they really needed to eat it all.

Hokey Pokey Ice Cream for my Dad was fairly simple.  I found a recipe for Hokey Pokey (also known as Honeycomb by the Aussies) which I'd never tried making before.  Made the Hokey Pokey, broke it up into chunks and mixed it through French Vanilla.

My basic recipe has changed a little from the rather rich Creme Anglaise recipe.  My process has also changed a bit too.

Basic Ice Cream recipe

9 egg yolks
1 1/2 C sugar
1.5 litres milk

Scald the milk in a saucepan.
Beat the yolks and sugar together until pale.  Heat gently in a double boiler, adding milk very slowly and whisking constantly.  When thick enough to coat the back of a spoon, take it off the heat and allow to cool.

Pour into a shallow metal tray and freeflow in the freezer overnight. 
In the morning, cut into chunks and run through food processor until soft-serve ice cream consistency.  This may take several batches.
Pour into container, label and freeze.

Wednesday, 23 May 2018

Pickled Walnuts

A friend's prolific walnut tree got rather wind damaged recently.  The trunk split into four large branches about waist height, with strong winds from an unusual direction, three of those branches split off the trunk and were lying on the ground although still attached to the main trunk.

Fearful that the entire crop would be wasted, we were invited to pick some green walnuts if we wanted some.

Not sure what to do with green walnuts, we were a bit dubious.  Then we were told about pickled walnuts.  Why not give it a go?  So we picked a fair amount of the small ones.


Pickled Walnuts take about 2 weeks before they make it into the jar, then a further 4-12 weeks (depending on your recipe) before they're ready to eat.

I was given a recipe by the friend who suggested pickling the walnuts, then I found 2 very similar recipes in my books at home.

I've been told they have a strong flavour, so when it comes to eating them with crackers and cheese, make sure you choose a strong cheese or it will get lost or overpowered.  I still haven't tried it, but I figure that I have enough friends who will take it if we don't like it.

A few notes and lessons I learned the hard way:

My fingers were this dark for weeks.
Walnut juice will dye your hands black.  Wear rubber gloves.  Six weeks later I still have brown marks on my fingernails.

This is only partially shadow - mostly it is blackened fingertips dyed by walnut juice


Even when your pricking tool (of whatever type you choose) goes easily into the fruit, it can still be quite hard on your hands.  A wad of masking tape as a handle makes a huge difference.

The brine looks dreadful after a day.  It goes black and oily looking and smells awful.  This is normal and probably why the recipe has you change the brine every three days.

All the recipes I found specified malt vinegar.  As I am Coeliac, malt vinegar is not an option.  I used white vinegar, but haven't tried the walnuts out on folks who know and love them yet to see if it made a big difference.

Pickled Walnuts


Prick the green walnuts all over.  Push your darning needle or pick tool at least into the middle of the fruit - discard any that are hard to prick.


Cover the fruit in brine and leave for 3 days.  Drain and cover again in brine for another 3 or 4 days.  Drain (again) and cover again in brine for another 3 or 4 days.

After brining


Drain.  Line a tray with newspaper and spread the walnuts out to dry in a warm place, turning occasionally for a few days  - or until black and dry.  A sunny windowsill is ideal for this.

Apologies for the blurry photo, but the colours should show.


Make the spiced vinegar:

2 tablespoons whole black peppercorns
1 tablespoon whole allspice berries
2 teaspoons whole cloves
1 teaspoon whole yellow mustard seeds
2 garlic cloves, peeled and sliced
4 thin slices of fresh ginger
1.8 litres malt vinegar
450g light brown sugar

Lightly crush the spices with a mortar and pestle to bruise them slightly.  Put into spice bag or muslin with garlic and ginger.
Heat vinegar and sugar with spice bag in a large pan to dissolve the sugar.  Bring to the boil and reduce to a simmer for about 15 mins.  Allow to cool before removing the spices.

Pack the walnuts into dry sterilised jars, cover with the vinegar and seal.  Store for 8 to 12 weeks before using.


UPDATE (21 Feb 2019)

These walnuts are awful.  They're hard and kind of woody and you can taste the vinegar but not the spices.

I read a piece from a company in England that has been making them for about 100 years, they steam theirs before brining and pickling.  I might try that next time.

Other things to do with Walnuts:

Apple and Walnut Crumble

Other Pickles:

Onion Jam

Thursday, 4 May 2017

Potato Rosti

As I wrote in the Potato Cakes blog, I used half of my 'damaged' potatoes to make Rosti.

I've seen many variations on recipes for these.  Some as simple as grated potato and some containing plenty of egg and flour.  I've seen failures on cooking competition tv programmes, where the Chef Judges' comments explained that washing the grated potato removes the starch that glues them together.

This recipe also comes from my old cookbook where I've gathered recipes over that past 25 years.

I didn't have any bacon, instead I used finely chopped onion.  I also cooked them in silicon egg rings so that I could keep some size consistency.  When they'd cooled, I freeflow froze them and then put them into a bag in the freezer.

You will notice a distinct lack of measurements.  That's because they don't really matter.  Obviously, you're not going to make a rosti that's 90% bacon.

Potato Rosti


Potatoes
Smoked Bacon (diced)
salt and pepper
Oil

Boil potatoes for 10 mins.  Grate coarsely and add bacon and salt and pepper to taste.  Heat oil in frypan and cook spoonfuls of potato for 10 mins each side.

Rosti cooking in silicon egg rings

Cooked Rosti cooling before going into the freezer

Potato Cakes

The harvest has been continuing and I've been digging up potatoes.

We've been quite surprised at how many we got in the end.  Water was an issue for most of the summer, I didn't mound them up as high or as well as I'd intended to and the chooks kept getting into the garden and scratching them over.

I've been going through them, washing the dirt off, spreading them out to dry before weighing them (just for my own curiosity), grading them and putting them into storage.

I found more than I expected that I'd stabbed or split with the fork when digging them up.  I also found quite a few diseased patches.  I've just done a google search and found the disease I was seeing is called Common Scab and would not have affected the way they store.  I pulled out these damaged potatoes, initially thinking that we'd just cook them up and eat them first, but the volume was getting to be more than we'd normally eat in a week so today I went looking for things I could do with them to be able to freeze and use them later.

I split them in half and made Potato Rosti and Potato Cakes.

I don't remember where I got the recipe for Potato Cakes from, it was hand written into my old cookbook at least 20 years ago.  Below is the basic recipe, I trebled it today.  I don't recommend doing this unless you have a commercial sized mixer and commercial oven.  It took me hours to get them all cooked.
These are gluten free so they tend not to brown, but they are cooked.

Potato Cakes


225g Self-raising Flour
350g Cold mashed potato
100g butter
1 tbsp milk
salt and pepper

Preheat oven to 230°C.  Sift flour into a bowl, add butter and rub in until mixture resembles fine breadcrumbs.  Stir in seasoning, potato and milk until a firm dough is formed.  Roll out the dough on a floured board and cut into 3" rounds using a plain biscuit cutter and place on a greased baking tray.

Bake or 10-15mins until golden brown.  Serve piping hot, split in half carefully and spread generously with butter.

Wednesday, 26 April 2017

Apple Jelly

I used to make great fruit jellies.  They had the right texture, they spread well and tasted wonderful.

Somewhere over the last few years, I lost that.  My jellies were either still runny, but in a hard toffee like way or they crystallised into a solid, crunchy mass.  I couldn't figure out where I'd lost my jelly making mojo.

I made some a couple of weeks ago.  It was as I was boiling the jelly with sugar that I realised where I'd been going wrong.  I wasn't boiling it hard enough.  After a few overflows where I'd ended up having to scrub burnt sugar from under the elements, I'd become afraid of having my jelly boil over.  At the same time, I realised that the pot I was currently using was too small and it was going to boil over.  I spent about 20 mins carefully snatching the pot up off the element as it was about to boil over, letting it settle back down and then doing it all again.  This got to be every 30 seconds I was having to lift it, but I did finally manage a perfect jelly again.  And I did have to scrub burnt sugar from under the element.

The thing that has left me a bit confused is I knew this.  I know the secret to a good jelly is to boil it hard and fast.  For some reason, I'd forgotten this and I still don't understand how or why.

Anyway, with the last lot of apples, I'm making some more.

Apple Jelly


Apple peels and cores.
Sugar

Put the peels and cores into a pot and cover with water.  Bring to the boil and simmer until it's all very soft.  Strain through a jelly bag overnight, do not squeeze.

Measure liquid and return to a large heavy based pan.  Bring to the boil and add sugar at a rate of 1 cup of sugar to each cup of strained juice.  Stir until dissolved and boil hard for at least 10 mins.  Test as for jam.  Pour into hot sterilised jars and put lids on.


With my last batch, I found that the pot for boiling the jelly needs to be at least four times the volume of the juice and sugar, because it will boil up that high.

Jelly just starting to boil

Jelly about to boil over
Finished jellies

Apple and Walnut Crumble

A few years ago I was given a great gluten-free cookbook.  Gluten-Free Baking Classics by Annalise G. Roberts.  I'd flicked through it a few times, but hadn't really used any of the recipes.  This was mostly because I hadn't been able to source the Brown Rice Flour that is a staple of most of the recipes.

I recently found brown rice flour and made up the flour mix.  I tried a few recipes from the book, particularly the Rustic Apple Tart.  It was delicious.  There was a spice mix that went into the apples that made them better than just diced apples.

It didn't use a lot of apples though and I had lots of apples to get through this time.  Several bags of apples that had been given to me by friends who'd had bumper crops this year and had already filled their own pantries and freezers.

I have ice-cream containers filled with stewed apples that we're just not using.  I made too much apple sauce to go with the pork we had, so there's that in the freezer already.

I decided to make apple crumbles.  I could bump up the volume of apples to suit the size of the dish.  I also looked at the amount of walnuts I've been given and chose to add them into my apples as well.  Last week I watched a Rick Stein show that included a woman somewhere in France making her apple pies, she added Armagnac to her apples which made us sit up and think that would be delicious.

I didn't have any Armagnac, I've run out of Cognac and Brandy (hubby's 50th birthday party was just over a week ago).  I tried to think what else would work with apples and remembered an apple and bourbon punch I had at a wedding.

I made two crumbles.  We tried the first one last night and declared it successful.  The other is in the freezer.

I didn't really bother too much with measurements, below are my best guesses.

Apple and Walnut Crumble


Filling:
10 cups diced apples
2 cups chopped walnuts
1 1/2 cups brown sugar
1 tbsp Cinnamon
1 tbsp Nutmeg
1/2 cup Butter
1/2 cup Bourbon
5 tbsp lemon juice

Mix all together and place in dish.

Crumble topping:

2 cups hazelnut meal
1 cup brown rice flour
1/3 cup potato starch
1/6 cup tapioca flour
1 cup raw sugar
1 tsp xanthan gum
2/3 cup butter, cold and diced

Mix dry ingredients and rub in butter.  Spread on top of apple mix and pat down.

Bake for 45 mins at 180 degrees Celsius.

On left with crumble topping, the one on the right is waiting for it's topping.

Wednesday, 19 April 2017

Black Grape Wine

When we still lived in Christchurch, we had a rather prolific grapevine.  We had no idea what variety it was, there were no tags and it was there when we bought the place.

Hubby had an old recipe book that had a chapter on beverages - most were wines and liquers.  Hubby had previously tried the grape wine recipe but when he opened a bottle of it a year or so later, it smelled like petrol and the colour was uneven (dark pink/purple at the bottom and clear at the top) so he'd thrown the wine out.  He'd written some of his calculations in the book and gotten them terribly wrong somehow.

I tried making wine from the recipe, exactly to the recipe.

Grape Wine (from the NZ Truth Cookery Book circa 1960s)


3 lb. black grapes, 4 quarts cold water, 3 lb. Sugar.

Put grapes in bowl and crush.  Cover with water, let stand 5 days, stirring several times daily, then strain.  Add sugar and stir until dissolved, set in a warm place to ferment.  Leave 10 days, then strain and bottle.

I bottled this wine and then had to clean up all the bottles that blew their corks.  So I put what remained back into the brew barrel and waited until the air lock stopped bubbling and then bottled it again.  It was a lovely pink colour, somewhat sparkling and very sweet.

The next year I made it again, but I did it in two batches.  One was straight grapes, and the other was blended with redcurrants.  The idea was that the redcurrant mix wouldn't be as sweet.

As it turned out, the grape wine was very different from the previous year's.  It wasn't as sweet, it was a darker colour and tasted a lot like port.  Very drinkable and rather alcoholic.  The grape and redcurrant mix took a few years before it tasted like anything worth drinking, but now it's very nice.

My grapevines this year had finally grown up over the archway and the grapes were hanging down and easily pickable.  This is from just two grapevines.

What is left of the grapes I didn't pick.


This time, I used not just my own grapes but some frozen ones I'd been given.  Some friends had been told that freezing your grapes first makes better juice more easily extracted.  All up I mashed 11 1/2 kg of grapes.  Then I did the maths for how much water I'd need.  48 litres of water.  Crap.  I didn't have anything big enough to hold it all.  So I asked the Hive Mind that is facebook how soaking the mashed grapes in less water would be likely to affect my wine.

Most of my homebrew winemaking friends said that they never add water.  Many of them never add sugar either.  Their wines are purely grape juice.  Hmmm.  I then consulted google, the ultimate guru on all things.  I found articles explaining where water is added after fermentation to keep the alcohol content to a level able to be sold legally in some countries.  I found an article that talked about how long to leave the skins in the water to improve the colour of a red wine.  Then I found an article explaining how water keeps the fermentation process going.  I also found an extremely technical article that included calculations to determine how much tartaric acid to add to your water based on degrees Brix and a whole bunch of measurements I'd never heard of.

I dithered and second guessed everything for a few hours.  Then I decided to follow the recipe as well as I could.  My recipe has been working for me for years.  I always make a great wine that tastes good and has a high (although unmeasured because I've never quite understood or bothered to find out how to do that) alcohol content.  I used a large plastic storage crate and added in what water would fit and left it to do it's thing for a week.

Meanwhile, I went and bought another brew barrel fermenter.  When it was time to strain and add sugar, I strained it into one of my brew barrels.  When it started to get a bit full, I split the total volume in half into a second barrel.  I put all the skins and pulp that I'd strained out back into the storage crate and added water.  I let it sit for a while and then strained it again to top up my wine to the total volume of water I was short.  I added the sugar to both barrels, put the lids on and fitted the airlock bubblers.  48(ish) litres of wine fermenting away madly.  And they are fermenting madly.  Two weeks later and the bubblers and going flat out.

Two brew barrel fermenters fermenting madly.

Monday, 5 September 2016

Lemon Curd

In my last post, I mentioned that I give something I've made back to the person who gave me their excess.  Unfortunately (or fortunately I suppose, depending on how you look at it), giving lemon cordial back to Mum and Dad resulted in another bag of lemons.

I'm all out of bottles for cordials, I still have more than enough cordial in the pantry to last us at least a year.  So this time, I made Lemon Curd.

I've found many recipes for Lemon Curd, although sometimes under the names of Lemon Honey or Lemon Cheese, but they're all very close if not the same recipe.  Even going back to the one I found in my Great-grandmother's recipe book from the early 1920s.

If sealed properly, Lemon Curd will keep for months in the pantry and years in the fridge.  Seriously, I just finished a jar of lemon curd that I made 3 years ago and it was still perfectly fine.

In my experience, this recipe will make approximately 500ml of curd - roughly one jam jar.  Increase it by how many jars of curd you want to make.

Lemon Curd


2 lemons
2 eggs
4 tbsp butter
1 Cup sugar.

Lightly beat the eggs.  Grate the lemon rind and juice the lemons.  Add all ingredients together in the top of a double boiler and cook gently until thick - don't let it boil.  Bottle.

It's really that simple.


Lemon Cordial


I've been given lots (and I mean lots) of lemons.

I'm the person people give their excess to, because I can always find something to do with it.  Sometimes what I do with it isn't particularly successful, but I learn from my mistakes and make something better next time.  I also make a point of giving something I've made with the various excesses back to the people who gave the original source material to me.  If that's not practical, I give them something else instead.


At the moment, it's lemons.

I started with lemon cordial.  It's always useful to have, it's great hot for coughs, colds and flu, and it's refreshing as a cool summer drink.  I've used a recipe that was given to me by a friend, she got it from her grandmother who used to make it every year and swore by it at the first sign of a sniffle.

It was nice, but I didn't find it particularly lemony.  You can kind of taste the lemon in there, but it's mostly a sweet drink.

This year, I decided to increase the lemon content in the recipe - partly for that lemon taste and partly as a way to get through those lemons.  The result was a strong lemon flavour, but it's still a sweet drink.  My family love it.

Lemon Cordial


4 litres hot water
4.5 kg sugar
75g citric acid
30 med-large lemons
1 or 2 oranges (optional)

Squeeze lemons and orange.  Dissolve sugar and citric acid in hot water.  Leave to cool before adding juice (boiling water will kill all vitamins).

Lemon zest may be added for a healthier (and stronger) option.  Add while syrup is quite warm and leave overnight or until cold.  Strain before bottling.

This made about 7 litres of cordial.


Friday, 26 February 2016

Butter and Buttermilk

Since we weaned the calf from Brownie, the volume of cream we're getting with our milk has increased significantly.  It becomes so thick and rich that if we don't scoop most of it off, it forms lumps in the milk jugs and looks as though you have melted butter in your coffee.  I don't mind this in the slightest, but it can be off-putting for others.

I finally understand the "double-cream" that I see in usually British recipes.  This is no good for a cream sauce as it splits and melts and looks quite disgusting.  So I make butter.

Butter is really simple to make. Put the cream into a cake mixer and beat it until it's butter and buttermilk.  With my cream, it doesn't take long.  In fact, it's quicker than whipping cream with store bought cream.

Cream


Nearly there, but not quite - note there's no liquid

Now we have butter


Once you have butter, press it together lightly and strain it through a sieve, making sure to catch the buttermilk in a jug.  Then run the butter in the sieve under the tap until the water runs clear.


Buttermilk.  You can see the tiny butter blobs around the edge of the jug.


Put your butter into a clean bowl and beat it quite firmly - more liquid will come out and more rinsing will be needed.  If you want to salt it, add 1 tsp of salt to 500g of butter and beat it through at this stage.

From there I turn it out onto baking paper, shape it into a block, wrap it and freeze it.  It doesn't keep as long as store-bought butter.  I don't know if this is because I don't always get all of the buttermilk out or if it's because I only pasteurise and do no further heat-treating.  Freezing has the added bonus of being perfect for making pastry.

The latest attempt at spreadable butter on the left.  A block for freezing on the right.


Several times I've tried to mix it with olive oil or rice bran oil to make it a simple sandwich spread - my mother used to do this when I was young, but it's hard to tell when you've added enough oil as it's soft and spreadable when it's freshly made.  So far, all of mine have been rather firm.

Many people ask what do you then do with the buttermilk.

Anything you like!  Choices are endless.  Miss Ten likes to drink it as it is.  It works nicely in my cheesemaking.  I've used it making bread and baking.  There's nothing particularly unpleasant about buttermilk, except maybe the odd tiny globule of butter that may be floating in it - and even then that's only if that is unpleasant to you.